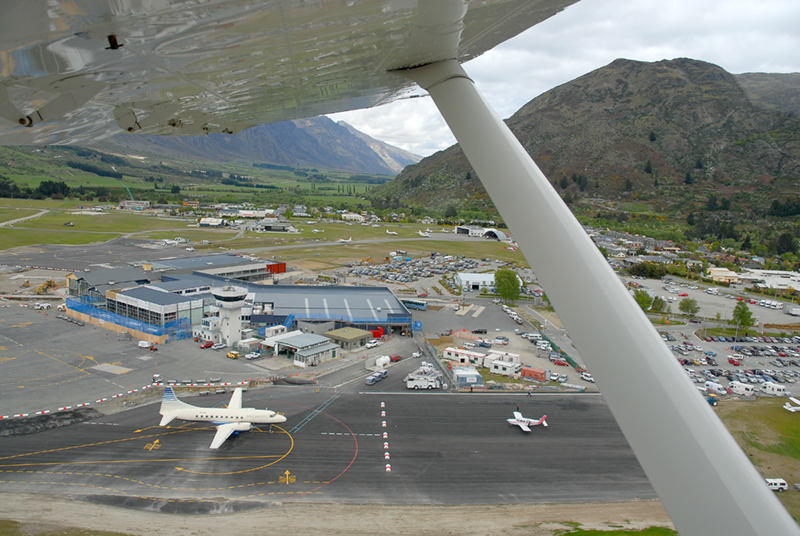
We came across this video this morning and could not resist sharing. This is one of the most beautiful instrument approaches – and it’s in the mountains too. The video is an approach into the airport in Queensland, New Zealand, to runway 05. Not sure what airplane it is taken from, but the sped up video is mesmerizing.
This is exactly why we fly!
The airport at this resort town of Queenstown handles large jets such as the Airbus A320, 737, lots of small charter planes and heavy helicopter traffic. The airport is always listed as one of the world’s top approaches.
This is the fourth busiest airport in New Zealand in terms of passenger traffic. It is only 1171 ft ASL. Runway lights were only recently installed in July 2011. The airport features only Precision Approach Path Indicators (PAPI) as a flying aid, so use of the airport is limited to within daylight hours only. Night flights are proposed but are controversial with the local community.
Sad news of a tragic crash in Alaska last weekend of a Cessna 208 Caravan, featured in the popular show Flying Wild Alaska. This aircraft was operated by Hageland Aviation which is a part of Era Alaska, the airline featured in the show.
Ten souls were on on board the Caravan as it was described by surviving passengers to have “dropped out of the sky” near St. Mary’s, Alaska, and out of those, only six survived. There were four casualties including the pilot and a 5 month old baby. The pilot of the Caravan was 68 year old Terry Hanson, and he wasn’t part of the cast of Flying Wild Alaska where the plane was featured.
The flight was operated in conditions reported to be low ceilings and freezing rain. The temperature at the time of the crash was -8 Celsius, or about 18 degrees Fahrenheit.
The weather conditions were so bad at the time of the crash it took rescuers over an hour to find the wreckage. The emergency locator beacon (ELT) was triggered during impact and helped air ambulance locate the scene. St. Mary’s is a remote village in Alaska inaccessible by road. It is about 760 km (470 miles) north west of Anchorage.
The airplane was one of the many aircraft featured in Flying Wild Alaska, a show that aired on Discovery channel from 2011 to 2012. The crash occourred on in the evening Friday, November 29. The flight was enroute from Bethel, through Mountain Village and scheduled to land in St. Marys, where it crashed 4 miles before the town. The footage of the crash was made available by the State of Alaska and is shown here. The image is disturbing and shows a hard touch down which appears to be consistent with a nose-down attitude. No details are known.
Cessna 208 crash. Image provided by the State of Alaska and from NBC news.com
Alaska is truly the land of flying and has the highest number of pilots per capita of any U.S. state and Canada, where one of 78 residents are pilots. Bush flying is very popular in Alaska and can also be very dangerous due to the remote terrain and often IFR flight is often not available due to the steep, mountainous regions. Alaska bush flying was explored in the show, Flying Wild Alaska.
According to the National Transportation Safety Board (NTSB), this accident pushes the number of deaths from aircraft crashes in Alaska up to 35 this year.
Planning a Flight from Canada to The United States – a Brief Guide for Canadian Private Pilots
Ever thought about flying to the U.S. once you are done your license? Or are you thinking about flying to the U.S. and don’t know where to start? Find out what you need to do in this guest post by John Maxwell from Golden Horseshoe Aviation!
Disclaimer: This post should not be used in lieu of a briefing from a qualified instructor or as the sole source of information, as rules and regulations are subject to change over time.
Start planning early
While there are a few extra steps involved in flying into US airspace, some procedures of flight planning are consistent with flying within Canada. As with any flight preparation, it is critical start flight planning a few days before take-off. There are several good online resources to help with the planning process, including COPA[1] and SkyVector[2]
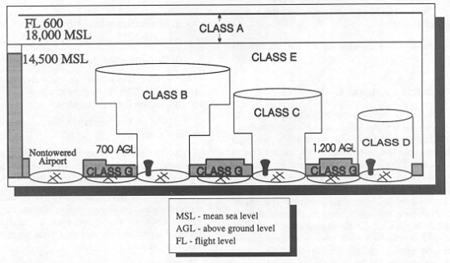
Learn about US airspace before you go. Image courtesy of Wikipedia.
1. Ensure that your documentation is in order (airworthiness certificate, registration, etc.).
2. Obtain charts and airport directories prior to taking flight and have these onboard when leaving, When flying to the US, ensure that you have current copies of both the US airport/facility directory (A/FD) [3] and The Canada Flight Supplement on board.
Using a GPS and flight following will add extra layers of safety.
Be aware that when you reach US airspace the flight watch frequency that reports weather and other flight related information changes from 126.7 to 122.0.
3. Call 1-800-WX BRIEFto check Notice To Airmen (NOTAM) advisories as well as Temporary Flight Restrictions (TFR), These restrictions can move and change on a day-to-day basis, so ensure that you recheck them again shortly before your departure.
Just as you should check TFR, you should read charts to become familiar with military operating areas. Take note of their dimensions and floors. You may need special clearance to fly through these areas or you may be able to fly beneath their floors.
4. Register your flight plan with the US Department of Homeland Security and submit your manifest to eAPIS (Electronic Advance Passenger Information System).
NOTE: simply filing with eAPIS alone is not enough. You also must provide advance notification to Customs by phone.[4] Moreover, you will be required to purchase a US Customs and Border Protection Decal and display it on the outside of the aircraft to demonstrate your free has been paid.[5]Remember that you must be in a plane with Canadian registration, unless you have a FAA license, in which case you can fly a plane registered with the USA.
Circuit procedures at uncontrolled airports
Perhaps the most notable difference when flying in the US is the circuit joining pattern at uncontrolled airports. When crossing the border either into Canada or into the USA pilots need to be on a flight plan and need to be in contact with ATC and your landing airport. The landing airport must have border services.
Open your flight plan!
While flight plans in Canada are automatically opened according to the proposed departure time, in the US they are not. Therefore, if you do not contact your ATC (or flight watch) directly to have your flight plan opened, your landing will technically be “illegal” as you will have flown without an opened flight plan. You can either call your ATC or flight watch or radio them to have the plan opened.
While most cross border flights are uneventful, it is prudent to consult a certified instructor and review the latest regulations during flight planning.
About the author:
John Maxwell
John Maxwell is the Chief Flight Instructor for Golden Horseshoe Aviation in Hamilton, Ontario CYHM. He has developed and delivered both private and commercial ground school training programs. He is a seasoned Transport Canada Commercial Pilot, Class II Instructor, Multi Engine as well as an FAA Commercial Pilot, Multi IFR, ATP written. He has over 3300 total hours flight time including 170 night, 100 instrument and 28 Multi Engine. He has provided over 2400 hours dual flight instruction.
John is a career instructor. While many instructors are building time to move on to ‘get a job as a real pilot’, John enjoys people and teaching them to fly airplanes. John’s collaborative style enables him to build lasting and meaningful relationships with his students.
As GHA’s CFI and Chief Operations Officer John is responsible for all operational aspects of Golden Horseshoe Aviation.
I recently watched the video of one of the most impressive landing and take off I have ever seen – a small plane landing on a ship at sea. This is right up there with the video of the Piper Cub that landed and took off on a mountain ridge.
Aerobakt Foxbat. Image from wikipedia
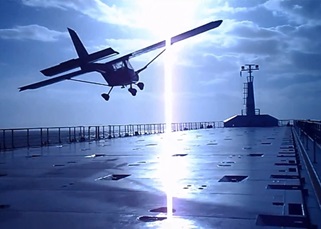
The pilot of an Aeroprakt A-22 Foxbat Xtreme, a British-registered kit plane, ident G-CWTD manoeuvres the plane over a landing strip of an aircraft carrier that is not more than 275 feet long.
The ship is an M2 Runner cargo ship. It’s length overall is 92.9 meters – or 305 feet. The length between the towers at the front and back is 84 meters – only 275 feet! Have you done your short field specialty take off and landings, especially those with obstacle, you will know that you have to calculate the amount of runway you will need to take off and land, and use special procedures to maximize the runway. But this is ridiculous. The Cessna 172 that I fly will require around 500 feet for the short field procedures. How is this possible?
Well if you watch the video, you will notice that the ship is sailing. The stall speed of the Foxbat is only 28-30 knots. The low stall speed means that the plane is able to fly quite slow before stalling. Compare this to the stall speed of a Cessna 172, which is around 47 knots (of course this will vary depending on weight, centre of gravity and so on). The Foxbat will stall at almost 20 knots slower.
The M2 Runner, like the one used for the landing and takeoff.
I don’t know much about cargo ships, but I researched that they generally cruise at speeds between 20-26 knots. Thanks to the pilot of the Foxbat, who contacted me and corrected me that the speed of this ship was only 9 knots – and in good conditions, the maximum speed is 13 knots. This means the plane will have to fly at least that fast, and obviously above it’s stall speed, to keep up with the ship. If there was a strong headwind, this would help him as well. Remember it’s not the actual speed of the aircraft will determine when the plane will stall.
So how is he able to fly like this? So the ship is moving forward at 9 knots, and there is also a headwind, then depending on the strength of the headwind the Foxbat should be able to fly above stall speed and it will appear as if he is hovering over the runway. He is obviously flying well within approach limits given the amount of control he has.
In the 172 we approach at 60 knots (with flaps) and 70 knots without flaps, and generally land at around 50 knots or so. Flaps will help him fly slower If we assume his approach but it doesn’t look like he is using them in this approach. When we perform a short field landing, we hit the brakes really hard. Because of the ships movement, the plane touching down will have the same affect as hitting the brakes. Timing has to be perfect … Take a look at the video:
At the last minute, the pilot veers in front of the ships tower in the back, lines up and bounces down on the ground. It looks like he still is able to land at the back half of of his “runway.”
The takeoff is even more impressive. Spooling his engines, he has several people hold the plane down (as he is no doubt pressing on his brakes as hard as he can). Then he lifts off, and looks like he used only 50 feet of runway or so.
This is a very impressive display of extreme piloting. This guy is an excellent pilot, and also a bit of a daredevil. He is definitely taking a risk by demonstrating this procedure.
I recently had the pleasure of speaking with the pilot, and though he said it was a dream come true, and things just came together to make this happen as the owner of the ship is a good friend of his – he wouldn’t do it again.
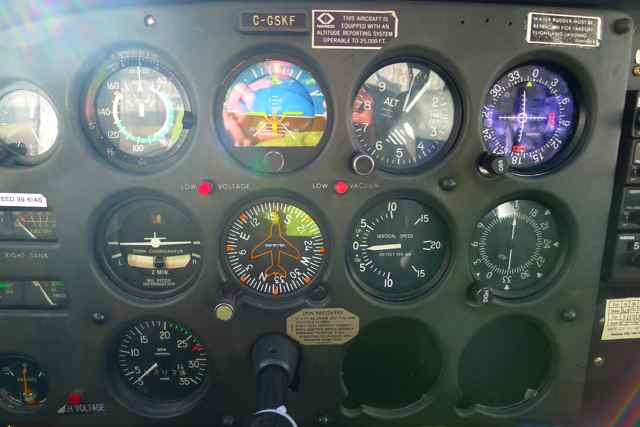
I’ve recently learned the basics of flying on instruments. First in the simulator and went on my first flight “under the hood” the other day. It adds a whole new dimension of complexity to flying. Just when you start feeling you have a pretty good handle on things, on comes the hood, and you’ve lost reference to the ground – and you are feeling like your world is quite small in the cockpit, with only your six pack of instruments, compass, navigation equipment and other cockpit items in front of you. No looking out your window … even if your instructor tries to tempt you, saying a 737 is passing overtop of you!
Why do private pilots need instrument time?
Transport Canada requires that private pilots receive 5 hours of instrument training, 3 of which may be in the simulator. Why do they do this? Getting a little bit of time “under the hood” can prepare you to deal with the worst should it ever happen to you. As VFR pilots with no night or instrument rating, we are not allowed to fly around in IMC (instrument meteorological conditions). But sometimes the worst can happen and we may inadvertently enter cloud or get caught up in bad weather where we loose visual reference to the ground.
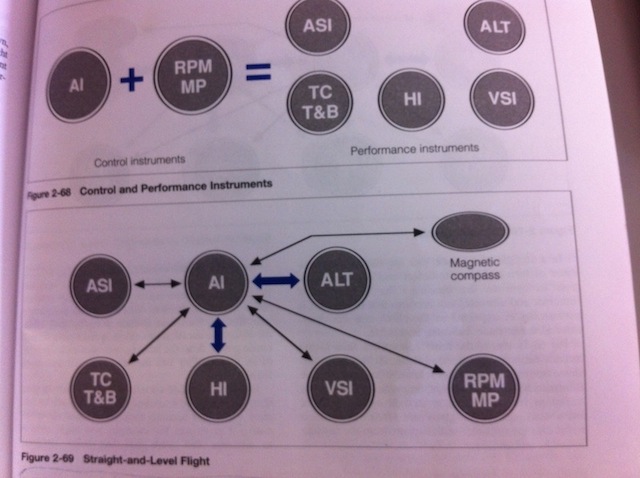
How to scan the instruments for different manoeuvres.
How do you fly on instruments?
The basics are explained very well in Transport Canada’s Flight Training Manual. In the airplane, we use a cover known as the “hood” and instrument flight is simulated with your instructor keeping an eye on the outside in VFR conditions. The main part has to do with understanding your control instruments and your performance instruments.
Attitude + Power = Performance
Your control instruments are Attitude Indicator (AI) and your tachometer (or Manifold Pressure Gauge). The combination of these two instruments will give us performance, measured by the performance instruments, shown in the Airspeeed Indicator (ASI), Turn and Bank Coordinator (TC), Heading Indicator, Altimeter and Vertical Speed Indicator (VSI).
The basic formula of attitude + power = performance stems from the relationship that any combination of different aircraft attitudes, coupled with a power setting will cause you to increase, maintain or reduce airspeed, altitude, turn and bank, heading and vertical speed. These five instruments can be referenced as indicators, or outcomes of changes in power or attitude. Some instruments are better than others to show these changes, and is known as the “scan”, which allows you to identify which instruments you should reference for what.
The attitude indicator is the heart of our scan. Because we have no outside reference to the horizon, it will tell us when we are flying straight and level and when we are banked, and reference it when we expect to be in a climb or descent.
To illustrate, recall that a nose down attitude coupled with a low power setting will cause a descent, (loss of altitude), a nose high and high power setting will create a climb, (gain in altitude).
To develop the procedures to refer to the proper instruments at the right time, always ask yourself the questions:
What information do I need?
Which instruments give me my needed information?
Is this information reliable?
Doing an instrument scan is how you use the technique. There are a number of different scans depending on the information you need. For example:
Under the hood. Just completed a simulated ILS approach for runway 35.
1. Straight and Level Flight: mainly attitude indicator, altimeter and heading indicator
What if our vacuum system fails? We will loose the vacuum-system (engine powered) instruments: the heading indicator and the attitude indicator. Since the attitude indicator is a very important instrument for us, we have to be very careful and apply the partial panel technique. Stay tuned for this in our next post.
Simulating an ILS Approach
When I went under the hood for the first time, my instructor asked me if I wanted to simulate an ILS approach for runway 35. He helped me out and I flew the approach, simulating an approach in IFR conditions. When he asked me to remove the hood, I was 200 AGL and the runway was just slightly to the right, about 1/4 nautical mile in front of us. I got us back on to centreline and did a nice, gentle landing. The ILS flying make me hyper aware and very sharp. It was a lot of fun!
At Springbank airport, we are very mountain effected and often have to deal with heavy winds. Speaking of winds, we found the most amazing landing and takeoff video we have ever seen. In this video, the brave Super Cub pilot, lands on the shoulder of a mountain in Central Nevada at 11,000 feet. The landing on Bunker Mountain is spectacular, but the take off is even better. You can see that his plane is equipped for rough ground landings given the large tundra tires. These are large, low pressure tires to allow operation on rough terrain on light aircraft. And rough terrain it is, the pilot lands on a talus slope.
The description says that it was very windy on that mountain. No doubt, he was landing into the wind, which allowed a very short landing and takeoff roll. The pilot is very skilled, you can see he dips his wing into the direction of the wind and returns to straight and level flight at the moment before touchdown.
Importance of winds to pilots
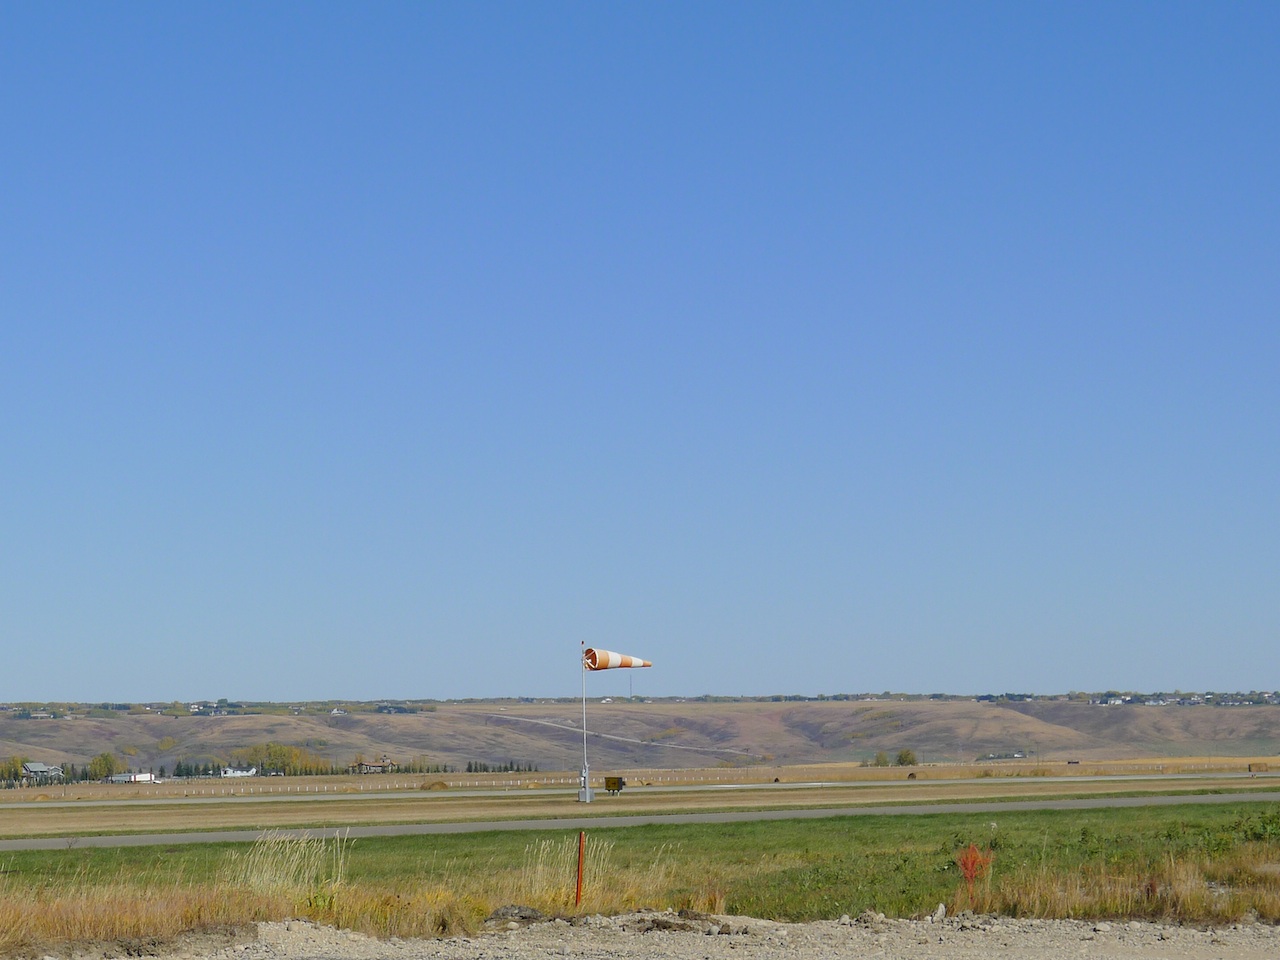
Winds are one of the most important things to understand when it comes to flying. Pilots have a very intimate relationship with the wind, it governs our go-no go decision, most importantly in terms of our take off and landing considerations.
Why does wind affect performance? Because our aircraft relies on the difference in pressures between the lower wing and upper wing in order to obtain lift, and remember it is always the relative wind that matters. So if there is zero wind, your aircraft will require more ground roll to lift off then if there was an headwind component. Why? Because it’s the relative wind that matters. For example, recall the relationship between stalls and angle of attack.
Recall in your POH that when calculating take off distance, you reduce your ground roll according to the amount of headwind you have. In the Cessna 172N, you decrease the ground roll by 10% for every 9 knots of headwind. This is because the headwind adds to the flow of air over your wings, air flow that otherwise you would have to generate with power.
The high altitude would have made the take off and landing roll longer, but it appears as if the winds were sufficiently strong enough to allow a shorter roll. And I do mean short!
I found the relationship with the wind is also strong when you ride a motorcycle. And it is a commonly known fact that many pilots do love motorcycles.
Flying out CYBW, Springbank airport which is number 6 for aircraft movements in Canada. We live near the rocky mountains of Alberta and are obsessed with mountains and aviation!
>>Read More >> Contact me

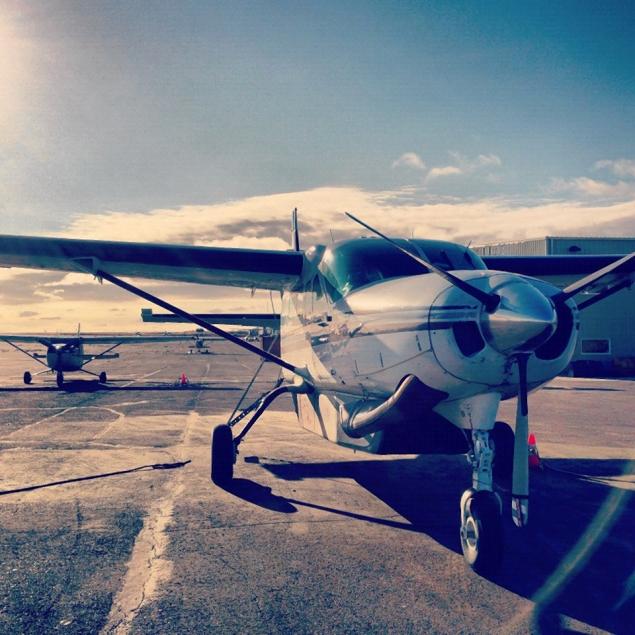
 . This aircraft was operated by Hageland Aviation which is a part of Era Alaska, the airline featured in the show.