Bose A20 Headset Review – a premium headset for professional pilots.
Here is our review of one of the best premium headsets around, the Bose A20. Stay tuned for more headset reviews.
Did you know that Bose pioneered the ANR (active noise reduction) headsets for the aviation market? The Bose A20 headset is one of the premium headsets available. In fact, this headset is rated the number one brand according to readers of “Professional Pilot” magazine in a 2011 headset survey. It was voted the most preferred headset in that year. This is the latest model up from the Bose Aviation X, which was voted number one in the same survey every year from 2000-2005.
This is the premium headset for professional pilots or for those who spend lots of time in the sky, and is especially recommended for loud propeller or turbo prop environments.
Both my flight instructors and about two-thirds of the instructors at my flight school own this headset. This is a testament to the extremely high quality performance of this headset, and it seems it is the one of choice for most career and professional pilots. Lightweight and comfortable, the headset weighs in at only 12 ounces.
The A20 is the latest model of this noise cancelling headset.
Features
Significant noise reduction, great for loud environments – such as flight training
Comfortable, stable fit with plenty of ear-room
Clear and crisp audio for reliable communications
Adjustable, powered microphone
Smart shutoff, powering off your headset when not in use – in case you forget to, saving battery
Auxillary audio capability for other devices, such as GPS, and Bluetooth® phone connectivity
Battery lasts approximately 45 hours (uses 2 AA batteries)
Intercomm and auxillary priority switching
Centre torsion spring on the magnesium headband provides a consistent, comfortable fit on any head
This headset boats all of the newest innovations for noise reduction and to provide comfort, while continuing to provide extremely clean audio. It includes and auxillary audio input and Bluetooth phone connectivity as well.
All Bose headsets come with a 5 year warranty directly from Bose.
Benefits
Significant noise reduction across a wide range of frequencies. Proprietary Bose innovations use microphones both inside and outside each ear cup to sense and reduce the sounds around you.
Proprietary ear cushions are compact, yet have a large interior cavity allowing plenty of ear room; redistribution of headset weight also helps provide overall comfort and stability.
What you get
The image below shows what is included when you order this headset. The headset itself includes two clothing clips on the chord and a control module. Also included is a carrying case, 2 AA batteries and an auxillary-in cable adapter.
What is included in the box when you order the headset. Image from Bose website.
Advantages
Best for flight training, flight instructors and professional pilots where noise reduction is key.
Great fit and comfort, very light at only 12 oz.
Bose has excellent customer service.
Disadvantages
Other than price, it is hard to find disadvantages for this headset. The new model has less clamping force so is more comfortable than the previous version (Aviaion X). However, some pilots complain the headset hurts their head on longer flights.
Since the take-off comes before the landing, shouldn’t we know how to take-off in a crosswind before we learn how to land in one? Well, yes, but there is a big difference in consequences between the two. We can always abort a takeoff (choose not to go flying that day) if we feel the conditions are not right, but once we are flying, we can’t choose not to land. Though it’s true that we can choose an alternate airport if winds are too strong to land in, and we absolutely should if we don’t feel it’s safe to land, but we should be able to land in a crosswind with proficiency if the situation arises. It is a normal part of flying and should be practiced until it presents no difficulty.
During the takeoff, directional control is maintained with rudder, just as in a normal takeoff. Depending on the strength of the wind, you may need more rudder than normal. Ailerons are deflected into the wind, which counters the tendency for the upwind wing to be lifted by the wing and rise.
To take off in a crosswind, recall that when we taxi in a crosswind we use wind inputs. As you add power, keep these inputs in all the way, and remember to add right rudder. As your aircraft accelerates slowly neutralize the ailerons and release the wind inputs you need on the ground. Anticipate adding your wind inputs as you get airborne to keep from blowing off the runway.
Remember, you want your runway directly behind you. Enter into a slip, the same as when approaching in a crosswind. Aileron into the wind – upwind wing dipped into the wind – and enough rudder to keep the longitudinal of the axis straight and aligned with your track on the ground.
Crosswind landings are one of the most frightening thing to learn for student pilots. For me, crosswind landings were one of the most challenging manoeuvres and probably took me the longest to perform proficiently. This is because they absolutely have to be mastered – you simply cannot fly and not be able to do this. But also with cross wind landings, experience is everything, and the more you do these the better you will be at them, and the more comfortable you will feel.
In the beginning when you are only flying with your instructor (dual), they make sure you are very comfortable and proficient at cross wind take offs and landings. Though on your first solo it is highly unlikely you will be sent up in any crosswind, you have to be prepared. What if the surface wind changes when you are in the air? You are on your own.
There are two basic cross wind landing techniques. They are:
Side Slip (or wing-low) landing
The Crab
The Side Slip
The most popular cross wind landing technique and the easiest is the side slip (different than a forward slip). This is the first one you will encounter when you are learning. In fact, in North American for flight training the side slip is preferred and the crab is largely ignored, until you get into more advanced training and more complex aircraft. The nice thing with a side slip is that the longitudinal axis of the aircraft is already aligned with the runway, so there is no need to straighten out the aircraft before touchdown. This makes the procedure slightly less overwhelming then a a crab.
Cross wind landing techniques. Image from Flying Magazine.
In a side slip, the longitudinal axis of the aircraft should be aligned with the runway and one wing, the upwind wing will be pointed down. To enter into a side slip, dip your upwind wing down into the wind, and apply opposite rudder sufficient enough to keep you aligned with the runway and from turning. You will have to adjust the amount of bank required to keep you flying in a straight line. Too much bank and the plane will move into the wind, too little and it will drift with the wind.
You hold these inputs until the flare, and hold off until the airplane is landed in exactly your approach configuration: you will land on the upwind wheel first. This is awkward at first, but this is usually brief as the downwind wing follows soon after.
Remember that when we are landing we have to use right rudder to counteract left turning tendencies, so anticipate this and factor it into the amount of rudder you will need when both wheels are on the ground.
Wind gusts will make it more challenging
When the wind is gusty, you will have to adjust your inputs to keep you on track. This is a tricky thing to learn and takes some time. If you practice often, you will get a good feel of how to keep the aircraft under control in gusty conditions.
The challenge with side slips is they don’t work for all aircraft types, whereas the crab works for all aircraft. They are also not suitable for instrument approaches (ILS) or gliding for range.
The Crab
The crab is more advanced because the configuration has to be changed just prior to touchdown. In the figure above note that your aircraft is not pointing straight in a crab approach – it is not aligned with the runway. This means that prior to touchdown, you have to release the rudder inputs to avoid cross loading the landing gear.
To enter a crab, point the nose into the wind and maintain wings level. Your nose will be pointed into the wind, unlike a slip, and your wings will not be dipped but level. Just prior to your wheels touching the ground, remove the drift and use the rudder to align properly with the runway.
As you can imagine, it is more challenging simply because your heading and track are offset and you must quickly straighten the airplane at the proper moment. When judging when to straighten the airplane out, it is better to do it too early than too late. It takes a bit of time for the airplane to be sufficiently affected by the drift to cause you serious problems. If you remove them too late, you will have a much bigger problem where you can cross load the landing gear, possibly damaging it, or worse. Use wind aileron throughout the roll.
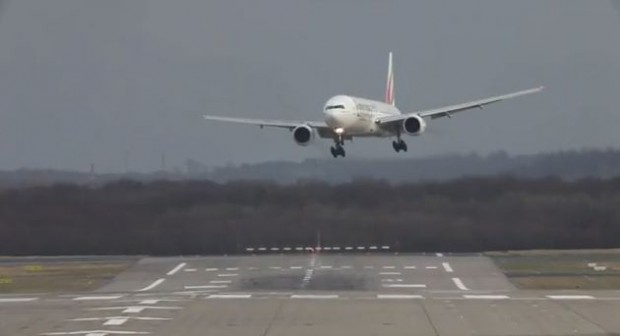
Crab landing in an airliner. Image courtesy of The Blaze.com.
This photo is an example of a fairly extreme crosswind landing. If the wind is causing this jet to crab so steeply, you can imagine that it is too strong and unsuitable for a smaller aircraft.
What about flaps?
Typically, it’s a good idea to always use flaps on approach, except in the case of a strong crosswind. The increased surface area of the wing just gives the crosswind more opportunity to blow you around, and when the crosswind is strong, don’t use flaps, or use less flaps in a moderate crosswind.
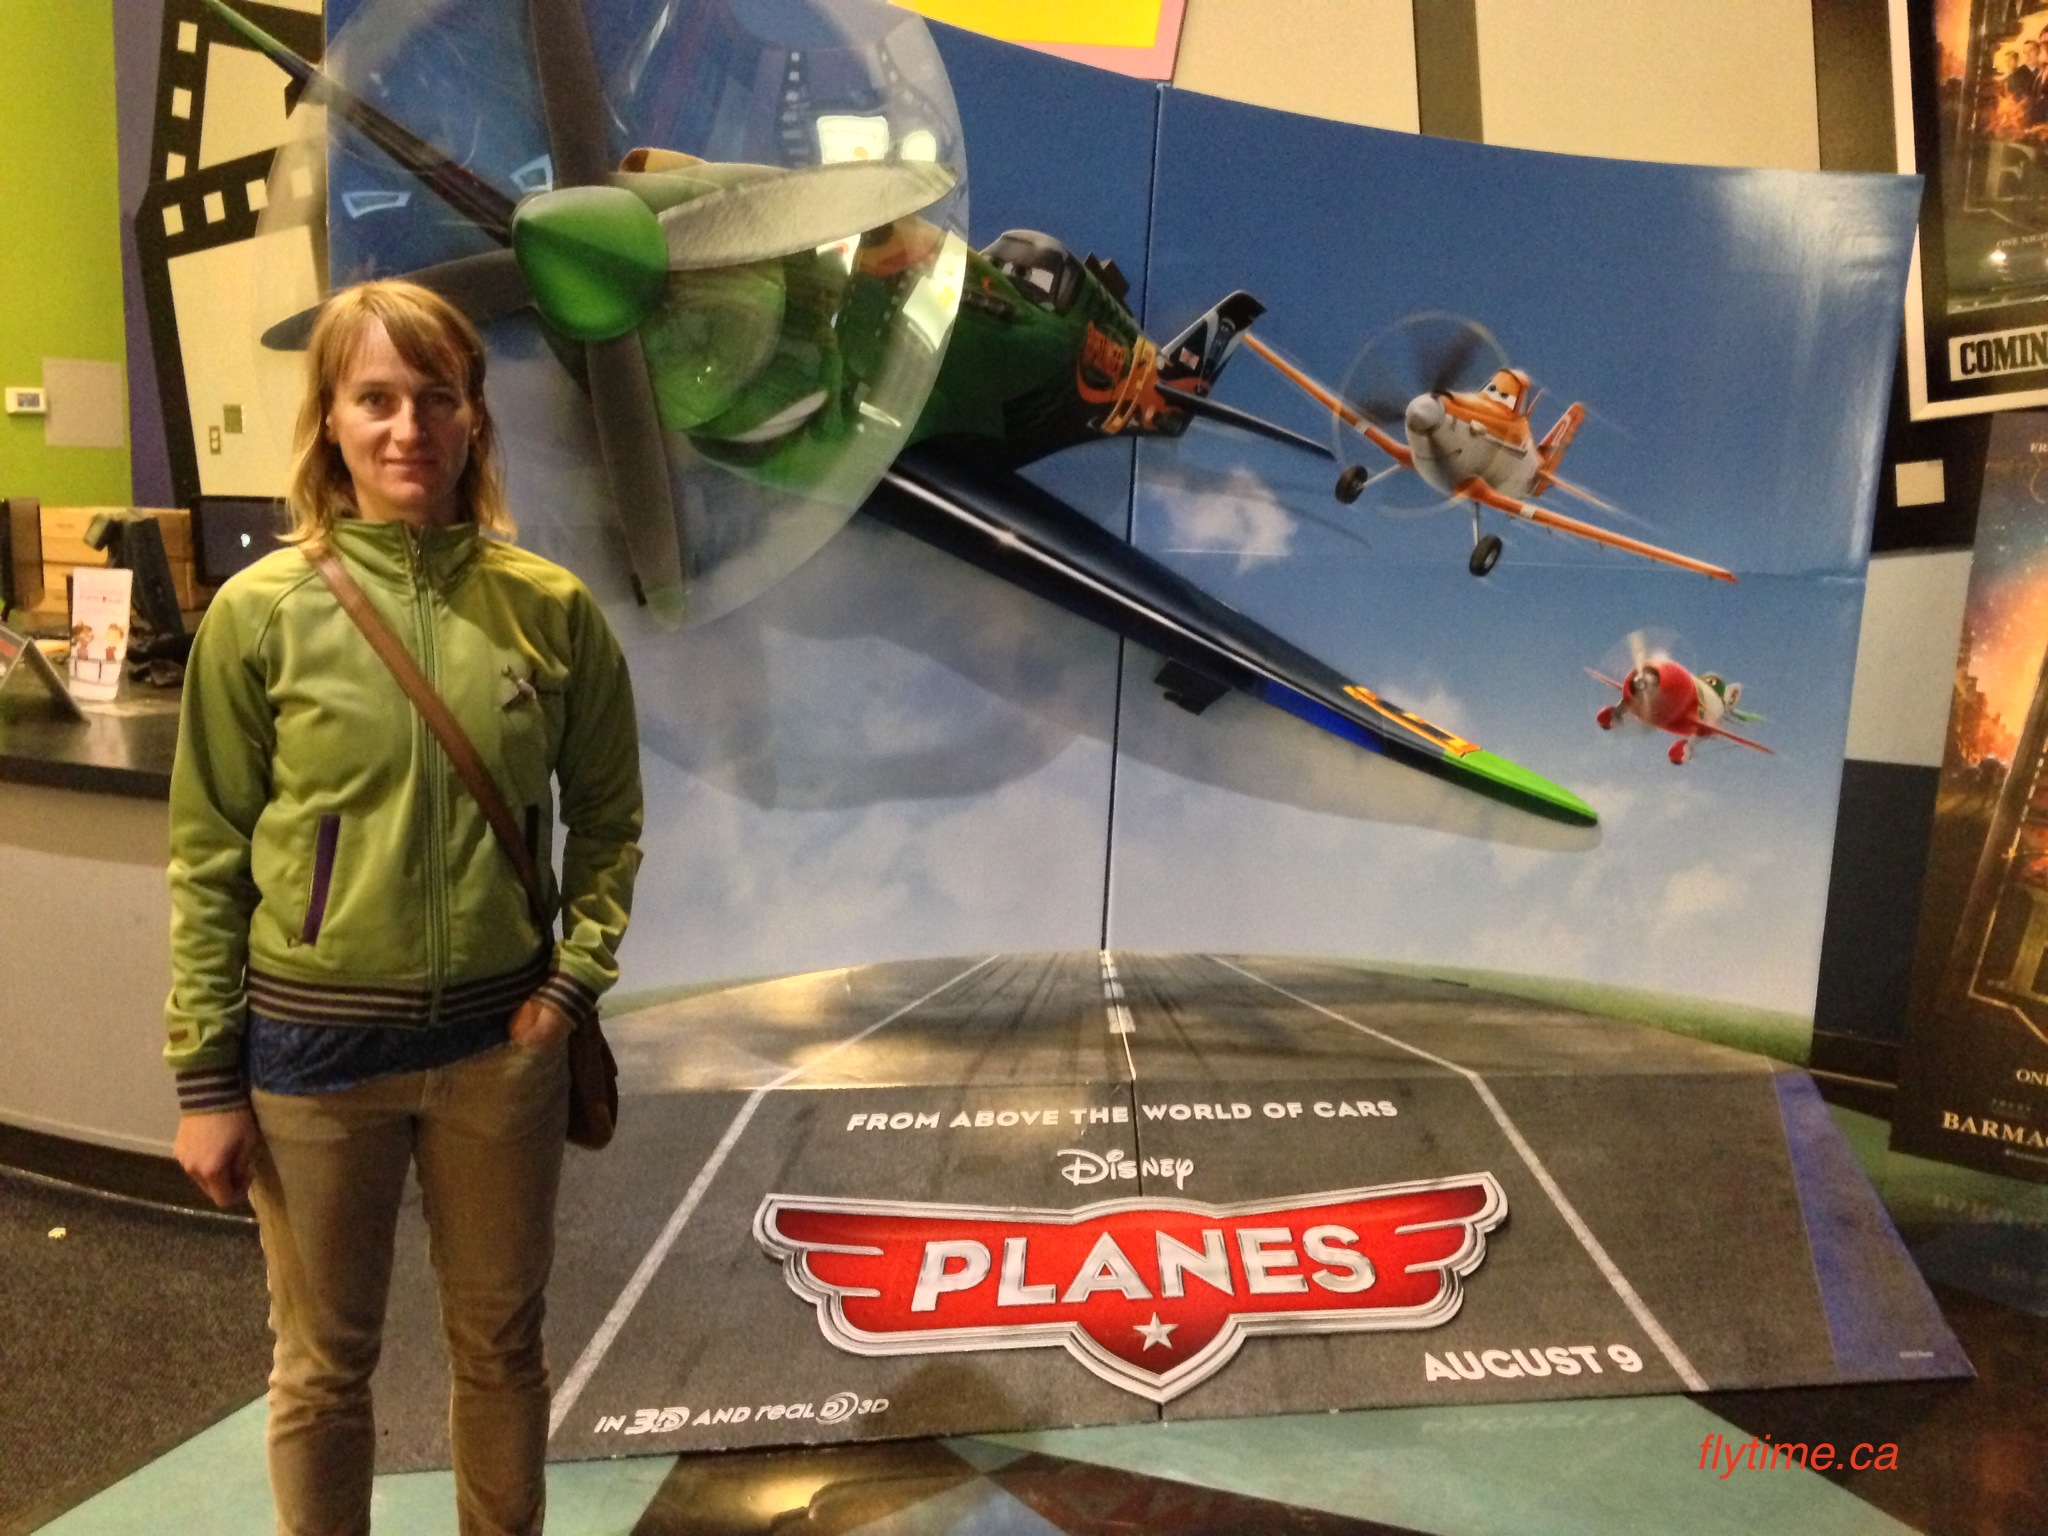
A true pilot geek, I couldn’t resist an invitation to head out and see Disney’s new movie “Planes” last weekend. Though I am not a fan of animation movies, this one is a bit different – and will be appreciated by aviation enthusiasts and pilots young and old. It is a charmingly modest spin-off from Disney’s “Cars.”
The movie is a story of Dusty Crophopper, a tail dragger cropduster plane that has big dreams to fly in an international air race. Used to flying low and slow – which is what cropduster planes are built for, he has to learn advanced aerobatics and loose his fear of flying at high altitudes. He is from the fictional town of Propwash Junction and has never flown above 1000′. He is flying no higher than circuit altitude.
The character is based on the Air Tractor AT-301 cropduster, and also bears resemblance to the Cessna 188 and also the Polish-made PZL-Mielec M-18 Dromader. In order to train for this race, Dusty enlists the help of Skipper Riley, a Chance Vought F4U Corsair, a carrier-capable fighter aircraft.
Air Tractor AT-300 was inspiration for Dusty Crophopper character in the movie. Image from wikipedia.Chance Vought F4U Corsair. Image from Airliners.net
The story is about never giving up on your dreams and helping those in need. Though this may sound cliche, keep in mind it is a kid’s movie, but and in fact, due to the great challenges of flying, not giving up on your aviation dreams is actually a common theme and important advice. What I’m more interested in is how technically accurate the flying scenes and aircraft detail are, which is no coincidence since a long list of aviation consultants were involved, including flight supervisor Jason McKinley, among many other experts, who helped make the flight sequence scenes look real.
The background story for the movie was an idea of executive producer John Lasseter, director Klay Hall and screenwriter Jeffrey Howard, through which the idea was born about some four and a half years ago. During the first rounds of production, they thought that the planes looked like toys and not real aircraft. It quickly became apparent that there had to be a strong focus on aviation realism.
Another expert consultant was flight and engineering specialist Sean Bautista. He oversaw that modifications to Dusty from a crop spraying plane to an air racer were realistic. Little things were kept in mind, in fact, he advised that they don’t supercharge Dusty’s engine because this isn’t possible with the Pratt & Whitney PT6. He also advised the model of wings that should be used to make him fly faster – Lockheed T-33. Impressive attention to detail!
The authenticity of an actual air race and air park are based on research as well. The producers made trips to Reno Air Races to get a feel for what racing is like, among many other places. The airplanes have a “pudgier” look to them to make them cuter and add character. As well, their canopies are higher so the eyes are visible. The only plane which is based soley on one type of aircraft is the hilarious Mexican Casanova El Chupacabra, based on a Bee Gee. The next authentic airplane is Skipper, based on the F4U Corsair.
Dusty is escorted by Bravo and Echo, based on F-18s used in Top Gun. Image from the Disney website.
One of my favorite recreations is the addition of Echo and Bravo, fighter jets based on F-18’s. These supposed to emulate Iceman and Goose in Top Gun! The jet fighters wear the same color helmets as the Top Gun characters, and Val Kilmer aka “Iceman” is behind the voice of Bravo, and Anthony Edwards, aka “Goose” is Echo.
I also noticed that great attention was paid to engine sounds. The sounds of the actual airplanes was recorded to match the respective planes they were inspired by. In addition to this, the movie was created in Disneytoon studios, which was a thriving and busy airport back in the early 1900s. The taxiways in the hallway no doubt served as a sort of subliminal inspiration.
The movie is a delight to watch and is a lot of fun in 3D. I was paying attention to the technical pilot stuff and probably missed a few other movie details, so I will catch it again when it comes out.
In the usual big movie studio style, Disney even made die-cast action figures, (planes) featuring all of the plane characters from the movie. Cute. Know any kids that are interested in aviation?
Have you seen the movie in theatres or are you waiting to get the DVD? Or both?
Read Sylvia’s account about getting back in the air and the challenges she encountered.
A control panel for a Cessna 152. Category: Images of Cessna aircraft (Photo credit: Wikipedia)
My flight test was done in a Cessna 152 last summer. I continued to fly until rough winds and low ceilings came in the fall, and decided I would simply pick it up again in the spring, thinking this would be an easy task. What I didn’t realize is that before I made this decision, I should have done some research and a little due diligence on what, exactly, it would require for me to be current again.
Before an airplane can be rented, a pilot must complete a practical and written test if that pilot has not either flown at that rental place before, or a significant amount of time has passed, (more than a few months), since the pilot’s last flight. The testing is documented and signed off by an instructor before solo rental can take place.
When spring came, I called my school and was informed the 152 was in maintenance awaiting a new engine. It was also scheduled to be painted. I decided I would wait a few weeks, and inquire again. By the time summer started, the paint was not dry and the plane was not ready to fly. The new engine also had to have at least 30 hours cross country logged in order to break it in before releasing it for demanding student use.
I therefore decided I would get current in a C172. Throughout my training in a 152, I flew a 172 occasionally, and have about two to three hours in a 172, and even though I knew I would have to get used to the differences in airspeed, attitude views, and just the general feel of a bigger plane, I suspected the practical flight exercises would be simple enough (sort of like riding a bike, so they say). I also realized that along with doing the exercises themselves, I also had to become familiar with flying a 172 again.
I requested a booking in a 172 which was similar to the 152. I wanted to eliminate as many differences as possible, in order to do the practical exercises, which would be stressful enough.
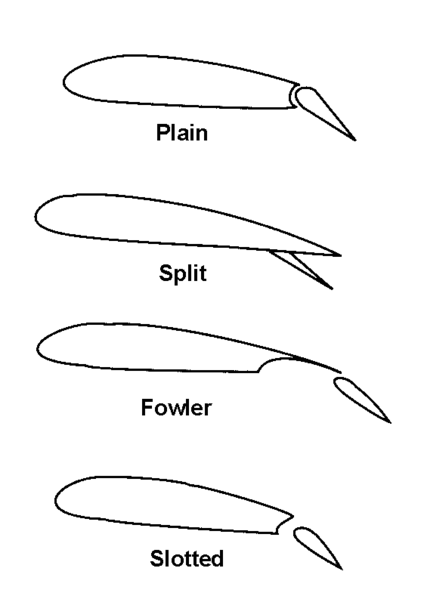
Four types of flaps. (Photo credit: Wikipedia)
Sometimes the instructor acts in the best interest of the school, rather than the student. Sometimes, it’s the other way around. Instructors that I tend to engage find the perfect balance. In this case, the instructor booked me in a 172M, acting in the best interest of the school. It was explained that in order for maintenance to occur on a regular basis with all the planes in the fleet, the students are often “bumped” into a different plane that what was booked, in order to accommodate the maintenance schedule. They further explain that bumping makes one a better pilot. When I realized this, I refused to fly the plane that I was bumped in to. In my training I want and expect consistency. I realize that adding items while learning to understand a particular maneuver, task, or exercise in a plane, is part of the graduated learning process. Yet, familiarity breeds comfort, and purposeful bumping into an unfamiliar plane, in my view, adds unnecessary challenges.
On the pre-flight walk around, I realized the flap setting in a 172M is similar to a 150, in that an electric switch is activated, and held until the desired flap setting is achieved. I did not realize that there was another 172 model with a flap setting similar to the 152; hence the booking I originally requested. Why Cessna even came up with this idea to engage flaps by holding an electrical timed switch is a ridiculous notion, should be recalled, abolished and changed to a notched “set and forget” setting in all training planes! I was then told that the 172N model has a notched “set and forget” flap switch, similar to the 152, but it was not available at the time of my booking.
I made a note to make my next booking in the ‘N’ model.
Amazingly, once up at 3,000′ in the practice area, I was successful with a slow flight demo, stall recovery and a forced landing exercise. My instructor was not pleased on how I handled the overshoot, and said it was likely due to the added drag of 40 degree flaps, and hand to eye muscle coordination. Little did he, at the time, or I realize how much difference my unfamiliarity with a timed flap setting would make.
I believed I had completed some of the upper air work exercises in the ‘M’, in order to get current, and that I was half way through getting my check ride signed off. Unfortunately, I had not received the school’s Currency Check Ride List.
On the one hand, it resembles a flight test and can be quite intimidating. I had no idea of the amount of items needed to be checked off on that list! Things from tower light signals, comm failure, and soft field takeoff with obstacles. Had I forgotten that much since my flight test?
On the other hand, the Current Check Ride List is a great way to review and remember forgotten items. In my latest issue of Flying magazine, I read an article on one pilot’s decision to make a short, soft field landing, and took off without flaps only to crash through the top of trees at the end of the grass strip. The article stated there was no accounting for the added Runway Friction Index (in Canada, “CRFI”), or that, according to the Pilot Operating Handbook for the accident plane, 10 degree flaps were required for a soft field takeoff with an obstacle. The article states that no flaps were applied. If they were perhaps the pilot would have cleared the trees. This was a serious reminder that I have to know that grass will slow me down on takeoff. I have to know that 10 degree flaps will give me better lift for a short field take off. I have to know to always be diligent with my weight and balance calculations.
One of my Facebook pilot friends, Ed Bryce, a well-seasoned pilot, posted this check list used whenever getting into an unfamiliar plane.
1. How do you control the flaps?
2. How do you set the trim?
3. How is the fuel system controled?
4. Audio panel: how do you set it and hear/talk on which radio?
5. How do you set the radios?
6. Is there a PTT (push to talk) button or do you use the hand-held mike?
7. Are there any engine/navigation instrument that you’re unfamiliar with?
8. Are there any controls on the panel that you don’t recognize?
9. How do you prime the engine (some planes use a fuel pump rather than the hand control near the ignition switch)?
10. Adjust seat for optimal attitude/panel view.
On short final
Perhaps my last two rides getting current and familiar with a 172, the instructors have expected more from me, and were intentionally passive, just to get a feel for where I was at. Now that I have this checklist in hand, I am going to use it, and take a more active role in what I want covered, when and how. I also have a copy of the Currency Check List, and will diligently review and go over each and every item with my instructor, checking the items off one at a time.
———————
About the author: Sylvia has a recreational pilot’s license and blogs about her experience with flying. Her blog features “chronicles of a passionate, enthusiastic female recently minted pilot, over the age of 50, who has come to appreciate that staying in ground effect and forward slips are the coolest thing.”
The relationship between stalls and airspeed is often misunderstood. It is not actually the airspeed of the aircraft that will determine when the wing will stall, but rather the angle of attack.
Stall recognition is generally taught with reference to airspeed only. Students are taught to pull up to stall the aircraft and continue doing so, watching the airspeed bleed off, watching the needle go from the green arc, through the white arc where this ends, and the airspeed at which that aircraft (in that particular configuration) is known to stall. Instructors drill into us the importance of angle of attack, and that the aircraft can stall at almost any airspeed. In fact, my instructor and I stalled the aircraft at full power settings. It was surprising and intense, and very important to recognize that this can happen.
There is no instrument to show the relationship between angle of attack and airspeed determining stall due to the complex forces that determine when an aircraft will stall, including weight of aircraft,load factor, the aircraft’s center of gravity, and other factors such as altitude, temperature, aerofoil contamination (frost or ice on wings) and turbulence. The airspeed indicator alone cannot measure when a stall will occour.
Your POH will give you stall speed with flaps up and flaps down configurations, for a certain weight. We learn in ground school that stall speed increases with weight, forward center of gravity (which acts like an increase in aircraft weight), load factor (such as in a turn) and when there is surface contamination. Once you know the basic stall speeds, it is up to you, the pilot, to be able to recognize when you are increasing or decreasing the stall speed.
It’s not the airspeed, it’s angle of attack
A typical lift curve, showing where lift angle is reached, which is about 16 degrees in this example. Image from wikipedia.org
Angle of attack is the angle at which the relative airflow meets the wing. This is what determines when a wing will stall. It’s important to understand relative wind – this is the way the air flows over the wing – when this is disrupted, air can no longer flow the way it’s designed to over the wing, and lift decreases. The critical angle of attack is reached when the maximum lift coefficient is obtained, after which lift will drop off when the angle is exceeded, and the aircraft will loose lift. After the critical angle of attack is reached, the aircraft is said to be approaching a stall.
The aircraft will always stall at the same angle of attack, called the critical angle. Many modern jets have an instrument that prevents the pilot from increasing the angle of attack past the critical angle, this is called the angle of attack limiter or alpha limiter.
Dangers of being low and slow
However this type of tool, or similar instrument is not in most general aviation planes. This leads to the pilot having to be very careful in making sure they don’t push their airplanes in into this flight envelope. When is a stall most dangerous? When you are low and slow. Typically, the base to final turn can be very hazardous, and this is corroborated with the amount of stall-spin accidents that happen during this circuit sequence (for general aviation airplanes). On this turn, you are low, and your airspeed is decreasing since you are on approach. When you turn, you increase the load on the aircraft, and if you push it into a stall (say, by executing a steep turn) you can enter a deadly stall-spin from which recovery is difficult due to the proximity of the ground.
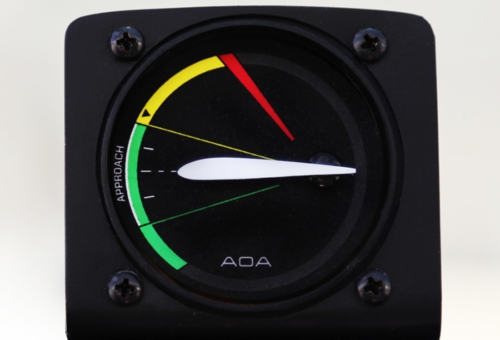
Recently I’ve discovered the aircraft manufacturer Icon Aircraft. This company has created an angle of attack instrument for general aviation airplanes. This instrument measures angle of attack and presents it to the pilot showing when they are flying within the proper range. This is a very interesting development that should go a long way into increasing safety.
I recommend watching the video about the concept below. Very cool!
Flying out CYBW, Springbank airport which is number 6 for aircraft movements in Canada. We live near the rocky mountains of Alberta and are obsessed with mountains and aviation!
>>Read More >> Contact me






 Have you seen the movie in theatres or are you waiting to get the DVD? Or both?