Posted on

Pilot Perception: Runway Illusions

On Final

The “softer” side of flying is the human factors side. As advanced as modern aircraft are, pilots are subject to various factors that can cause them to make excellent decisions and judgement calls but sometimes make decisions that can be potentially dangerous. Luckily, illusions pilots experience are well understood and documented.  We know when we may experience an illusion.  In instrument flying for example, we learn how to ignore what our body is telling us – for example, that we are in a steeply banked turn when we are in fact in level flight – we learn how to trust our instruments in IMC.   Sometimes the message our body is telling us can put us in danger if we subscribed to it.

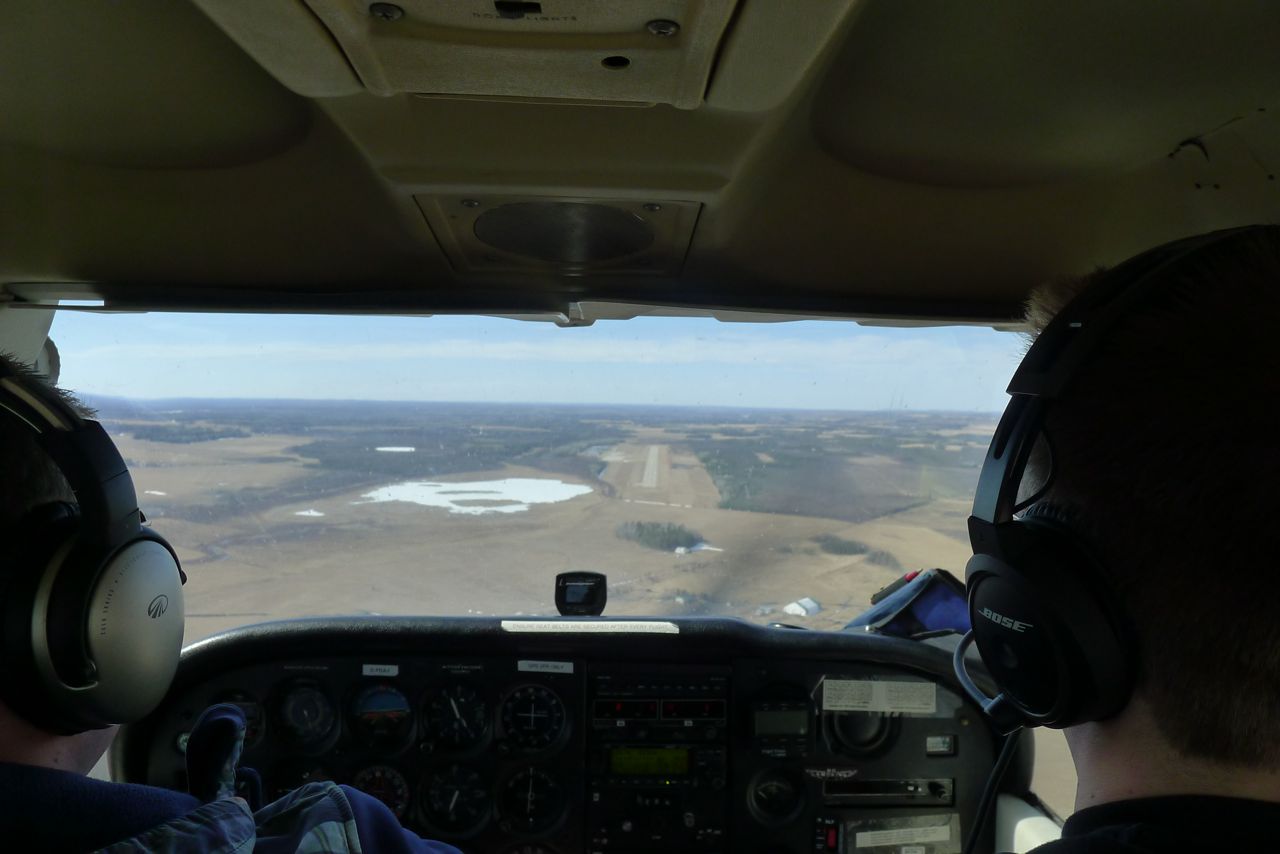
We are governed by the messages our body is sending to our brain.  This affects our flying and our perceptions of certain situations.  When we are approaching a runway with a up or down slope, or when we are approaching a runway that is level but the terrain before the runway is up or down sloping, it is possible and expected to incorrectly plan our approach.

Runway illusions are very common in flying, and are the result of our brain telling us something other than what is actually happening because it is extrapolating on what it sees.

Runway slope illusions. Image courtesy of americanflyers.net

When a runway is upsloping, the pilot thinks that the runway continues on an upslope from the terrain before it, hence thinking the terrain in front of the runway is upsloping as well.   The pilot will judge their altitude as too high, because they perceive the terrain continues on an upsloping, positive angle towards the runway  and will consequently plan a low approach that can cause landing short of the runway.

The solution? When flying toward a known upslope runway, expect that you will perceive being higher than you actually are and plan to land long on the runway.

When a runway is downsloping, the pilot thinks that they are too low and will consequently plan a higher approach and land long on the runway, or may even have to overshoot.   This is again, because of extrapolating on the slope of terrain before the runway.  Thinking that the terrain continues on a downslope towards the runway, means that the terrain is actually higher away from the runway than on the approach path; so that the entirety of the approach path follows downsloping terrain.  The pilot will incorrectly judge altitude as being too low when in fact he is too high.

The solution to planning an approach on a downsloping runway is to anticipate feeling like you are too low and plan to land short of the runway.

Also, when the runway is level but the terrain before the runway is upsloping: the pilot will extrapolate the same way.  They will think the runway is upsloping as well, and be subject to the same upslope illusion, and should plan to land long.  Alternatively, when the runway is level but the terrain before the runway is downsloping, the runway will also be judged as downsloping, and the pilot should plan to land short to avoid an overshoot.

It is hard to memorize the concept but I found that a good way of learning and remembering the concept is to draw an upsloping or downsloping runway and flat terrain in front of it. Then draw a straight dashed line following the angle of the runway towards the approach path, and this will be the pilots perception of the approach terrain.   From there we can easily imagine whether the pilot will feel too high or too low in each situation.

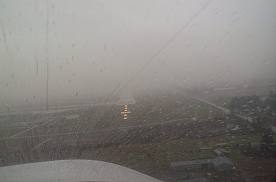
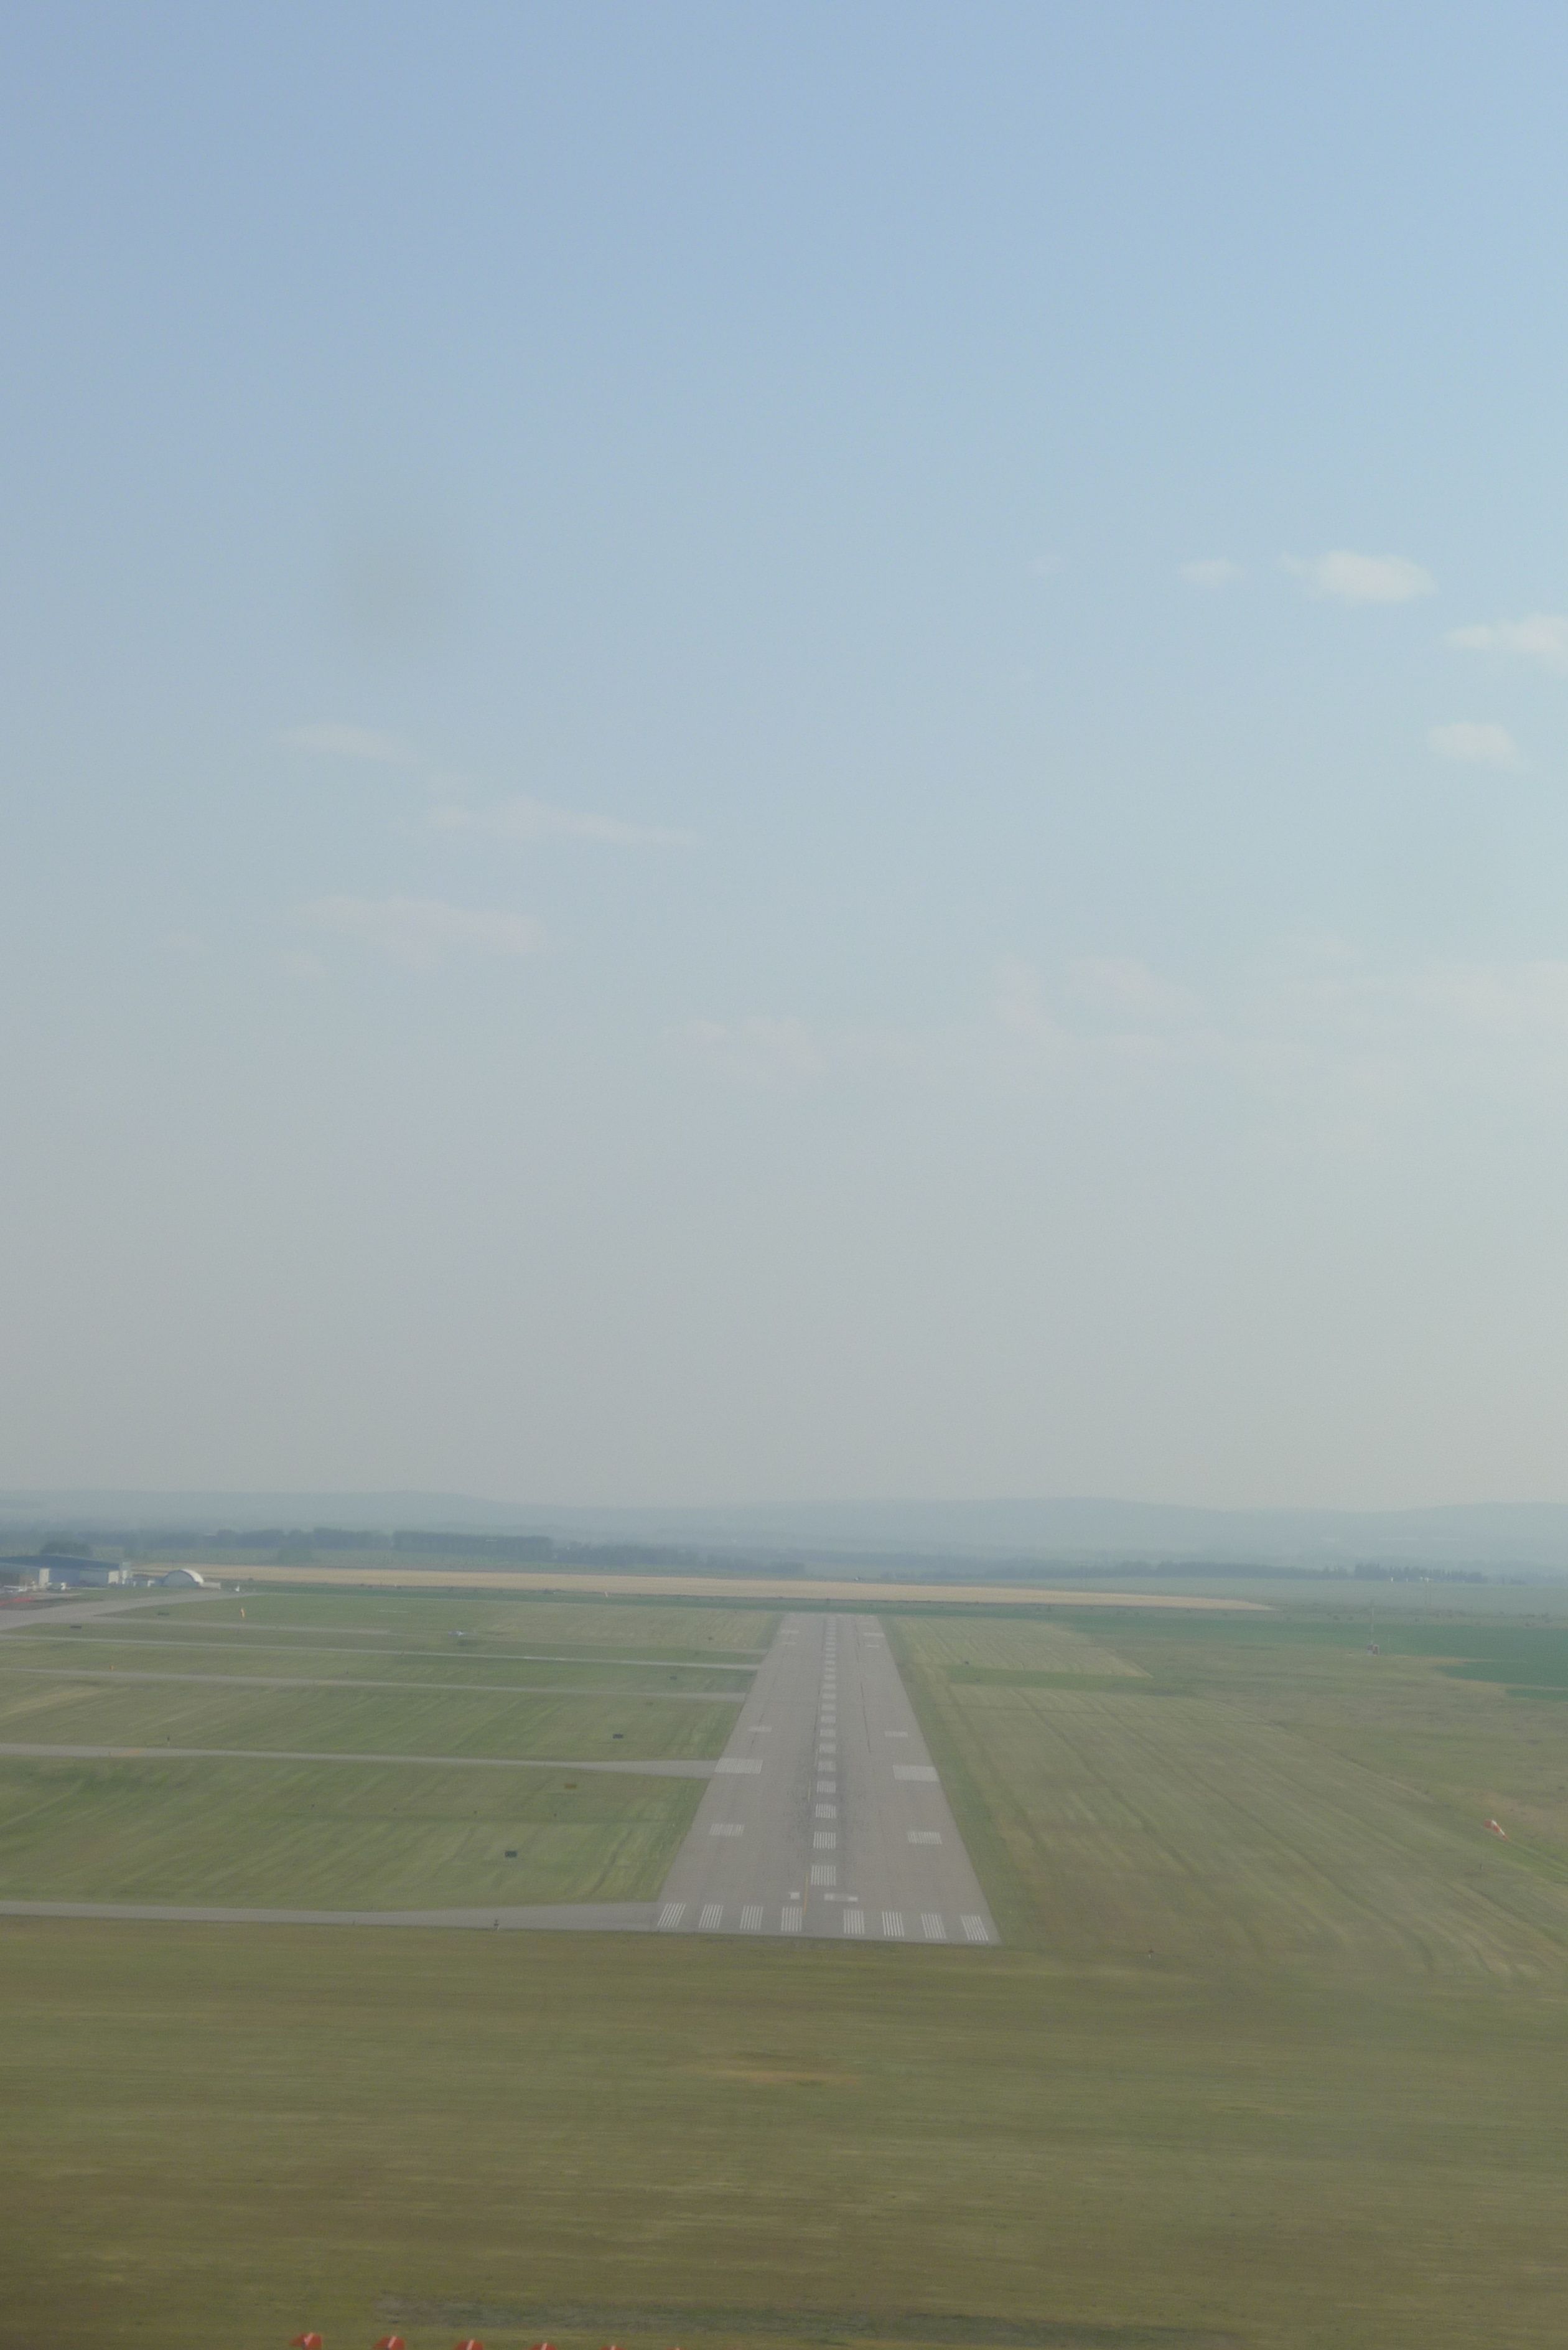
Rain on the windshield can create the the feeling of greater height and haze can make distances appear greater than they are. This is a favorite Transport Canada exam question as well!
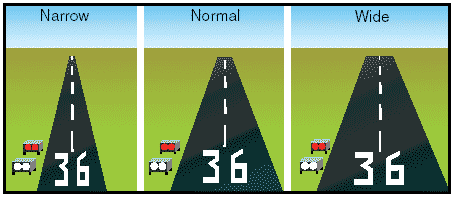
Wide and Narrow Runway IIlusion
Wide and Narrow Runway Illusion

There is also the classic, wide and narrow runway illusions.  When a runway is narrow, this creates the illusion that the plane is higher than it actually is, resulting in a low approach and possible land short of the runway. With a wider runway, the opposite occurs, we perceive the plane lower than actual, and can cause the pilot to flare too high or overshoot the runway.

Writing a lot of exams lately, I noticed that Transport Canada likes to test these topics!
Posted on 1 Comment

Density and Pressure Altitude

Hot summer flying makes for low density altitude.

When we go flying, we always calculate pressure and density altitude of our aerodrome and for our cruising altitude. Why do we do this? Recall the definitions of density altitude (DA) and pressure altitude (PA).

PA is the “height above sea level corresponding to a given barometric pressure under standard air conditions” (FGU, page 41).  What are standard air conditions?  Standard air conditions state that at sea level, the air has a pressure of 29.92″ Hg and temperature of 15 degrees C.  As we increase in altitude, the air cools at the adiabatic lapse rate of 1.98 degrees per 1000 feet.  This allows us to calculate our altitude for pressure given the pressure reading at our aerodrome. To calculate this, we always subtract our current altimeter reading from standard pressure of 29,92,  multiply by 1000 then add it to the actual AGL elevation of the aerodrome.

For example, at Springbank, when the altimeter reading is 30.15:

29.92 – 30.15 = -0.23 * 1000 = – 230  then add to the altitude of CYBW which is 3940:  3940 + (-230) = 3710.   This means that the actual pressure, at standard atmospheric conditions, is lower than actual field height.

The reason we need to know pressure altitude is because our altimeter is a pressure altimeter.  It is important to set the altimeter because knowing the actual height of the airplane is of vital importance.  An altimeter setting that is too high will give an altimeter reading that is too high, a low setting will show a reading that is lower than we actually are.   Generally, most standard altimeters doesn’t go above a pressure reading higher than 31.0 0″ Hg. Such high pressure readings are found in very cold, dry air masses.   To correct for this, the pilot can add 100 feet for each 0.10 ” reading above this figure.  This will give the true altitude of the aircraft.

So why do we need to know pressure altitude anyway? When we do flight planning, we need to calculate it for our departing aerodrome not only to have the proper pressure setting for our altimeter, but also because the performance of the aircraft is based on pressure altitude.  These are more direct engine performance things, like fuel burn, true airspeed and engine thrust. We always look at our POH to find the true airspeed which we base on pressure altitude, like climb and cruise performance.

Hot, hazy summer day produces high density altitude and reduced performance

Density altitude is based on pressure altitude. It is simply pressure altitude corrected for temperature.   Once we calculate pressure altitude, we use the following formula:

DA = PA + [ 100 * (Actual Temperature – Standard Temperature) ]

Actual temperature is self explanatory, if we are looking for temperature of our aerodrome it will be given in ATIS or if we are looking for the temperature of our cruising altitude that is available in the Upper Wind Forecasts (FD’s).  To get  standard temperature recall the definition of standard air conditions: cools at the adiabatic lapse rate of 1.98 degrees per 1000 feet. So we can calculate this ourselves to know what the standard temperature should be at our chosen altitude.  For instance, for my last flight I flew at 6000 feet and the standard temperature at this altitude is (6 * 2 = )12 degrees less than 15 degrees, or 3 degrees.  We can also refer to our aircraft’s POH, where standard temperature for the pressure altitude is listed.

Density altitude is important to know for lift and aerodynamics.  Have you ever taken off from an airport on a hot, hazy summer day and noticed the decrease in engine performance?  On these days it takes longer to accelerate and become airborne because the air density is behaving as if it were in much higher altitude – where there is less air for the aircraft to “grab” onto.  DA is important for calculating safe fuel and payload permissible for takeoff.

High density altitude makes take off and climb take longer. Last summer, on 30 degree days when flying circuits I noticed that I was consistently not reaching circuit altitude until I was well into my downwind leg. Typically, I reach the altitude on crosswind.

What gives good performance?  Low altitude (higher air density), cold and dry. Bad performance? High altitude (lower air density), hot and humid.

Also read how altitude affects performance.


Posted on

Air law – definitions of Canadian airspace

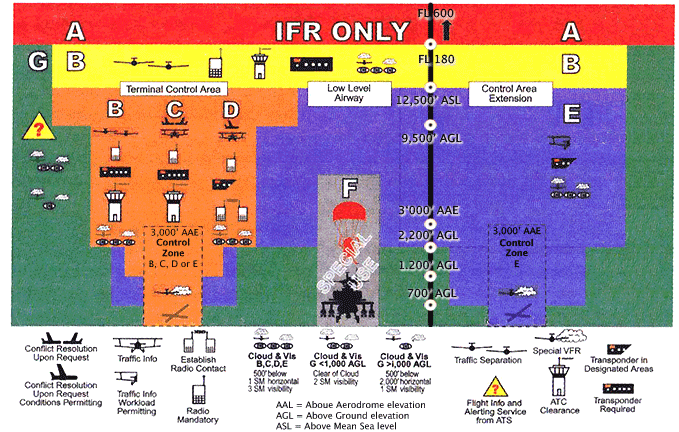
Canadian Airspace. Image from IVAO.com

Following up on the previous article on air law, let’s review some details about Canadian airspace.

Air law is such a big topic and is very hard to cover in it’s entirety, so if you want more detail or more material refer to From the Ground Up and Canadian Aviation Regulations,  the Canadian Aeronatical Information Manual.

Canadian Domestic Airspace is divided into seven classification, each identified by a single letter.  The rules governing each airspace depend on it’s classification and not by which name the airspace is commonly known.  Control l or terminal areas can be classified B, C, D or E but weather minimums for flying are still related to the common name of the controlled or uncontrolled airspace.

The classification, as you may remember from ground school, looks sort of like an upside down layer cake, where the smallest classifications are nearer the ground and larger zones extend upward.

Class A 

This is all controlled high level airspace, only IFR flight is permitted. It spans from FL180 to FL600, inclusive.  ATC (air traffic control) is provided to all aircraft, and require clearance to enter.

Tower at YBW. Contol zones can be class B, C, D or E.

Class B

In class B airspace, IFR and VFR traffic is allowed. ATC is provided. It includes all controlled low-level airspace between 12,500 and up to, but not including 18,000. VFR traffic must file a flight plan and request a route to enter.  A pressure altimeter is required (has to have been certified within 24 months) and a transponder with mode C capability.

Class C

IFR and VFR permitted. VFR must be cleared by ATC to enter. Terminal control areas and associated control zones may be classified Class C when the appropriate ATC unit is not in operation.  A 2 way radio and transponder with mode C capability is required.  In case of a communications failure, squawk 7600.  Otherwise,  VFR traffic must use 1200 on transponder.

Class D

Both IFR and VFR traffic are permitted, and VFR must establish radio communications with ATC.  ATC separation is only provided to IFR traffic.  Terminal control zones can be classified Class D, and if there is no ATC they will revert to Class E.

 Class E

This class of airspace exists when none of the requirements for neither A, B, C, D are met. Both IFR and VFR are permitted but again, ATC separation is only provided to IFR traffic. There are no special requirements for VFR traffic.  Low level airways, control area extensions, transition zones and control zones without an operating tower may fall into this category.

Class F

Forbidden or advisory airspace.

Class G

Does not fit into any of the other airspace categories, and ATC has neither the responsability nor obligation to manage traffic. This is uncontrolled airspace.  Low level air routes and aerodrome traffic zones fall into this category.

It’s easy to forget these classifications.  A useful mnemonic to remember these types of airspace and what is associated with each will help you remember!

A = Airliners. IFR only. Between 18,000 and 60,000 feet.

B= IFR.  Between 12,500 and 18,000

C = Clearance required to enter

D = Dialogue is required. Do not enter before talking to a controller.

EEasy for VFR, Everyone gets home from this class of airspace, no need to talk to controllers.

F = Forbidden, or Fancy  – special use airspace.

G = General uncontrolled airspace.

And of course, the U.S. has their own unique system of classification.  Information on the U.S. system can be found in From the Ground Up.

Posted on

What is VFR?

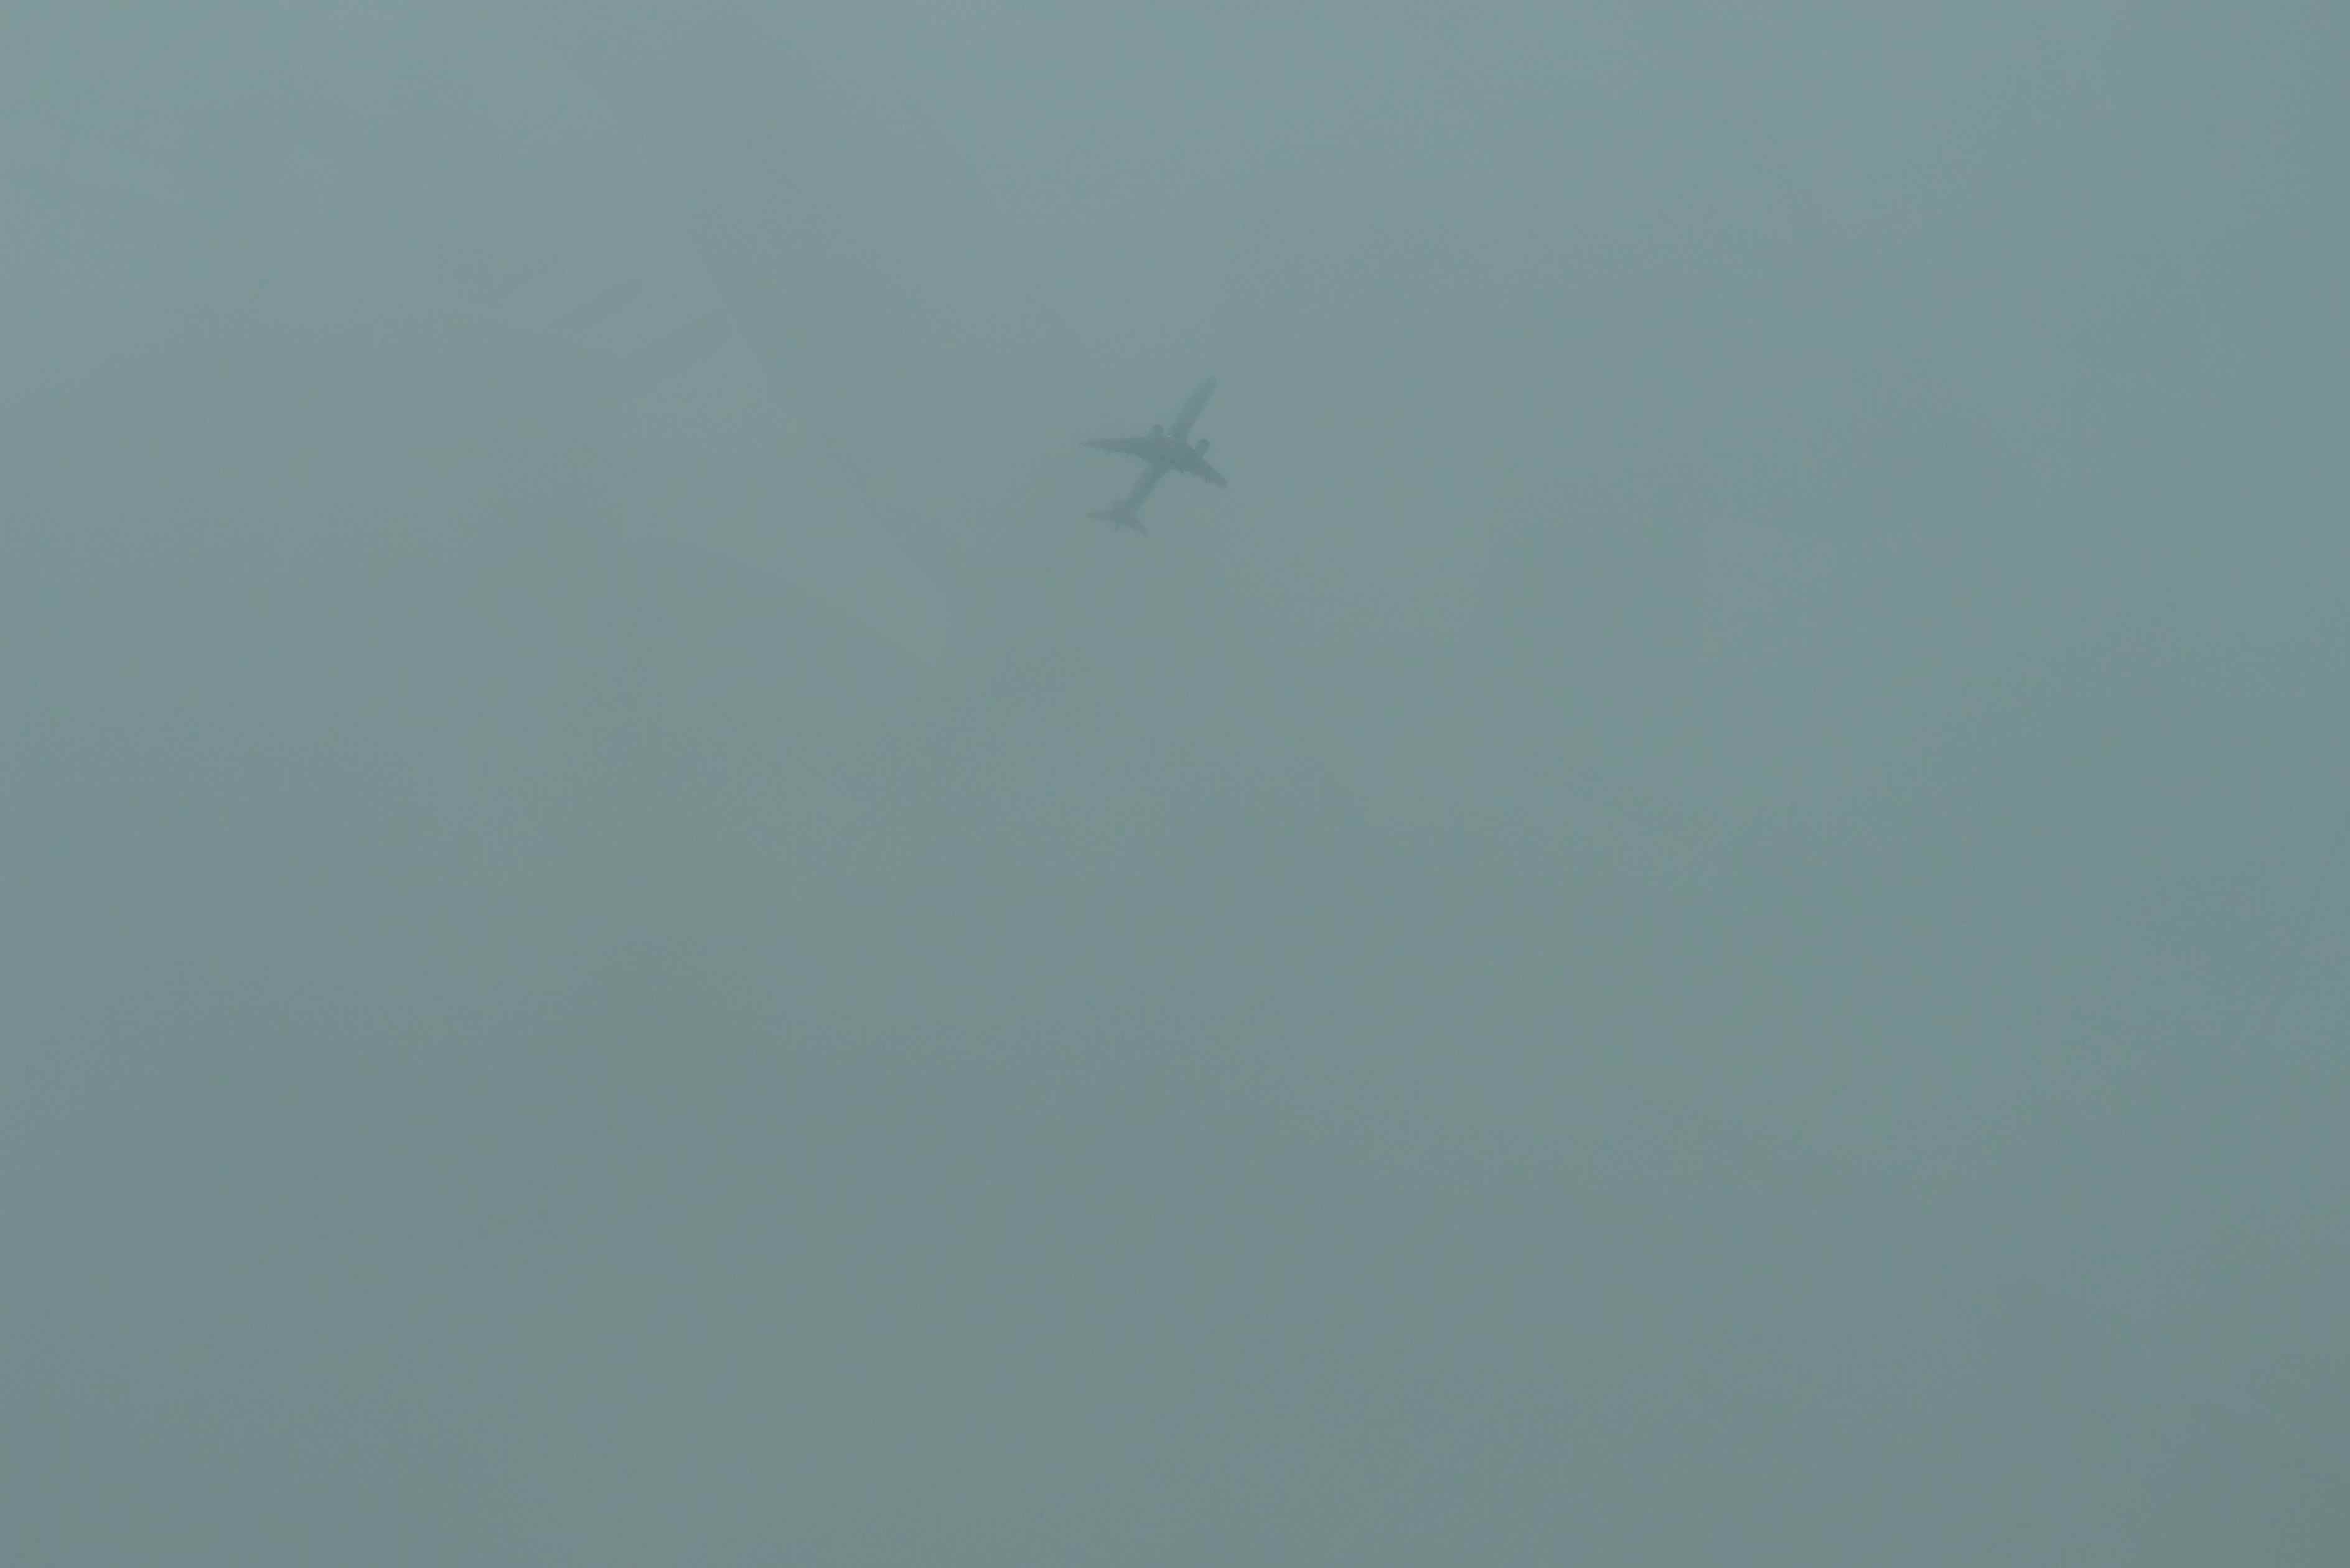
IFR Flying Conditions. Image Courtesy of Langley Flying School.

It’s springtime, and out here in Alberta the weather is all over the place. From clear, sunny, calm days arrive strong wings, snow, sleet, rain, low ceilings and all sorts of weather, signifying change of seasons. Yesterday for example we did not have VFR weather here.  In fact, with a visibility of 1/2 SM, vertical visibility of 500 feet and snow at CYBW we have LIFR, or low instrument flight rules conditions – this means ceilings and visibility conditions below IFR minimums. Ceiling is below 500 feet and visibility is less than 1 SM.

There are two kinds of flight rules, visual flight rules and instrument flight rules.  VFR stands for visual flight rules and means the pilot flies the aircraft with visual reference to the ground, using landmarks, roads, avoid aircraft in the vicinity, avoiding terrain and obstacles.  The pilot must know where they are at all times and maintain visual contact with the ground at all times.

Weather minimums have been established to allow the pilot to fly VFR.  These are listed in the table below:

VFR Weather minimum. Image from the AIM and Langley Flying School.

As long as these minimums are observed, the pilot can fly VFR.  Remember that some types of airspace do not allow VFR traffic, or VFR traffic must seek permission in order to enter certain kinds of airspace.

Also applying to VFR traffic are altitude rules. VFR traffic flying at 3000 feet AGL or higher must follow specified rules about altitude depending on direction flown. Cruise altitude is based on magnetic track. The altitudes are:

For headings: 000 degrees – 179 degrees = ODD thousand + 500 feet

For headings: 180 degrees – 359 degrees = EVEN thousand + 500 feet

VFR traffic is not allowed to fly over cities (built up areas) lower than 1000 AGL, and should not descend below 500 feet AGL during flight – of course this does not apply to special flights (police, ambulance) nor during take off or landing phases of flight. This explains why the traffic helicopter always seems to buzz my house!

VFR traffic can use instruments to operate, but are not allowed to rely on them unless they have an IFR rating, and are flying IFR.

Pilots flying VFR are allowed to start a flight that is initially VFR but changing to instrument meteorological conditions (IMC), and where visual flying will not be encountered anymore.  The best thing to do in this situation as a VFR pilot is to either fly straight and level until the conditions improve, or complete a 180 degree turn where you came from to return to visual conditions. Also, if you are near a control zone, you can request SVFR – special VFR.  The aerodrome must have at least 1 mile visibilty and you must remain clear of cloud.

If you are not near a control zone and encounter these conditions, you are forced to fly IFR.  The best solution is to avoid IMC if possible unless you are IFR rated.

Another solution is to fly VFR “over the top” or OTT.   This is a special rating that private pilot license holders can get to fly over cloud cover, maintain visual contact with other airplanes flying IFR while giving VFR pilots greater flexibility. This rating can be added to your PPL with 15 hours of  flight training.

Posted on 8 Comments

Learning to Land

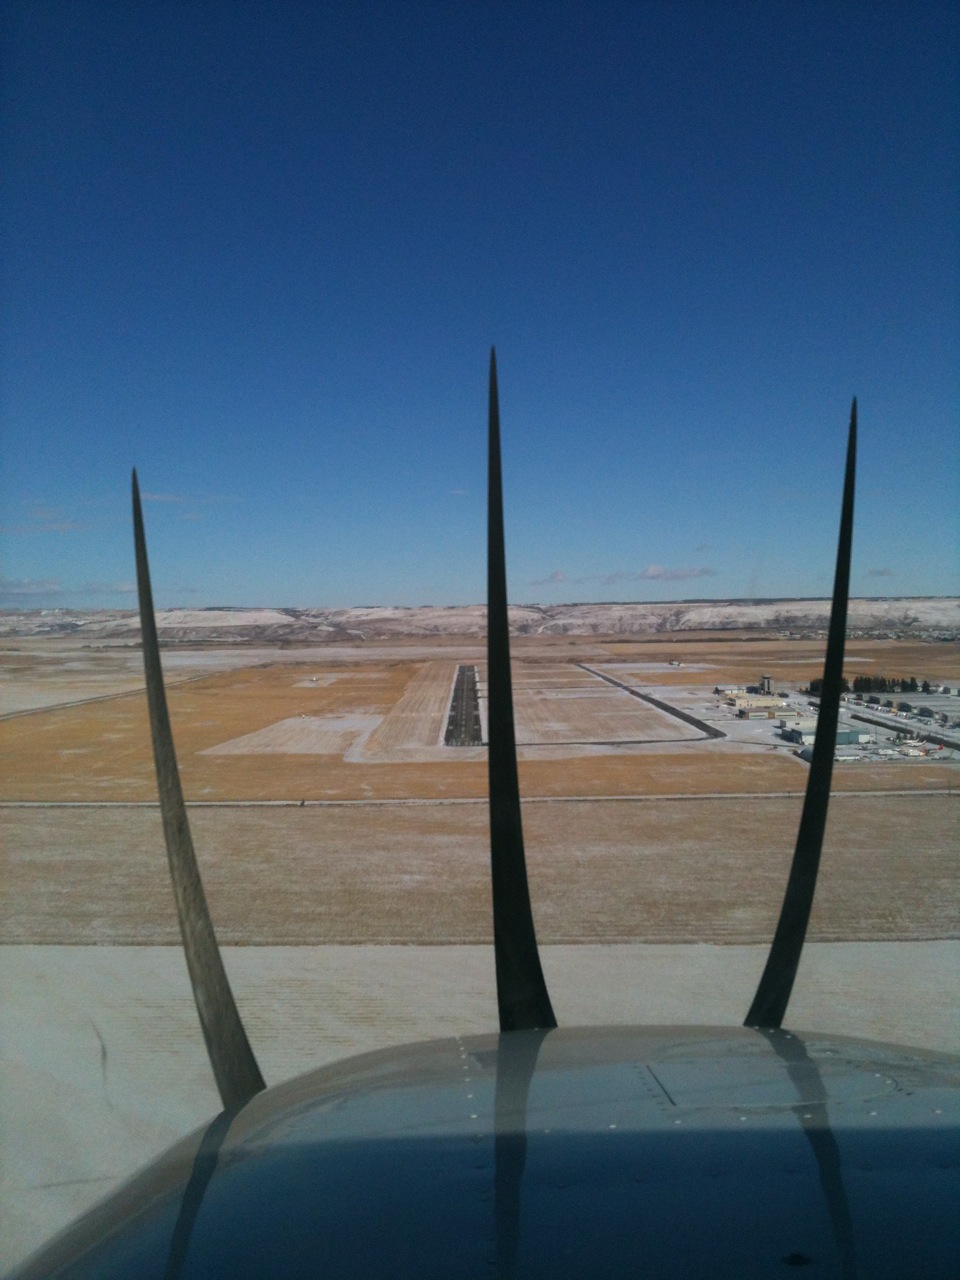
On approach for runway 34, CYBW

One of the hardest thing in flying is learning to land.  When I was struggling with the landing, my instructor made me feel better by letting me know this, and saying that she didn’t really “learn” how to land until she was doing her commercial license.  Of course she knew how to to it, but by that she meant that she didn’t really feel fully comfortable until then.

This put a few things into perspective, how long it will take until not only will it feel natural but you will not be so terrified and dry-mouthed every time you do it.  Since my first solo flight, I have really started paying attention how to possibly make the best landing happen consistently.  I haven’t been flying in the circuit much lately, so each flight I only get to do one of these landings so I try to make it as good as possible.

The landing sequence. This plane is about to flare.

One of the things that is very apparent is the amount of right rudder needed.  As you cut power to idle, and flare, you are operating the aircraft at very low power settings. Asymmetric thrust will cause the aircraft to want to yaw to the left: recall that the aircraft has left-turning tendencies which cause left yaw. This is actually what I noticed very clearly on my first solo flight, thinking it was the wind that was causing my nose to yaw to the left on landing, my instructor quickly corrected me that it was not using enough right rudder.

Four things will cause left -turning tendency. These are:

1. Torque reaction from engine and propeller

2.  Slipstream causing a corkscrewing effect of air hitting the tail on the right, yawing the aircraft to the left.

3.  Gyroscopic action of the propeller, the propeller is a gyroscope and tries to “spin” the aircraft the opposite way.

4.  Asymmetrical loading of the propeller at high nose attitudes.

On landing, asymmetric thrust causes the left yaw.  When you touch the ground, be prepared to add even more right rudder. The engine torque will cause the left wheel to carry slightly more weight than the right, increasing it’s drag and causing even more yaw to the left.

So how can you strive to make each landing perfect? I’ve made a list of steps that I think are very important to note:

1.  Check winds. When flying in the downwind leg, when on final, or whenever you get a chance note the windsock so you know what winds you will be experiencing on the ground and on your final approach. Will you have a crosswind?

2.    Approach at a constant airspeed for your configuration (whether using flaps or not), do not “chase” the airspeed: that is, do not focus your attention on the airspeed indicator and try to correct deviations by switching attitudes.  Establish your airspeed well in advance on final, note how the horizon looks when you have reached the proper airspeed, and keep it there. Once you have your airplane in the right attitude, keep it there.

3.   Pick a spot on the runway. When you stare at this spot, this is where you will flare. It also allows you to break down your desired touchdown spot and keep you from focusing on the entire runway.

4.  Flare 5-9 meters (15 to 30 feet) from the ground.  Over time, you will “sense” where this point is. I learned that to recognize this point is to when the movement of the ground suddenly becomes very apparent, the whole landing area seems to expand, and the point where the ground seems to be coming up so rapidly that something must be done about it.

5.  Once you flare, wait for the sink.  You are trying to bleed off airspeed.  Once you feel the sink, pull back more, just don’t pull back more before you feel the sink. This will cause the aircraft to balloon – gain lift – and the high nose attitude can cause you to stall when still too high above the ground resulting in a hard landing.   You need to cover up the runway with the nose of the aircraft to get the proper high nose landing attitude.  It will feel uncomfortable at first – it did for me.  This will allow you to avoid touching down with your nose gear, or having a ‘flat’ (three wheel) landing, which increases the risk of wheelbarrow. Pull back slightly each time you feel a sink, this will allow you to check your rate of descent until all flying speed is lost and you can touch the runway as lightly as possible.

6. Get in the habit of keeping your hand on the throttle throughout the landing. If something happens, for example if the landing is not going well and you need to overshoot or if there is something else wrong and you require application of power, the time to get this power if your hand was not on the throttle is too long.

There are four different kinds of landings:

  1. Normal landing
  2. Cross-wind landing; where wind inputs will be needed
  3. Short field landing, and
  4. Soft field landing.

We learn each landing and we practice all of them until they present no difficulty.

Posted on 3 Comments

Chair flying pilot training

IFR Anyone? Even if we can't fly, we can still practice by visualization.

Chair flying is a recommended way to keep up with your pilot training

It’s the first day of spring in the Northern Hemisphere – March 21 – but you wouldn’t know it by looking outside.  We have snowstorms all across Alberta with the city of Edmonton under a snowfall warning.  When we have bad weather days and aren’t able to fly, all is not lost.  Aside from simulators or Microsoft Flight Simulator Software, there are other ways we can practice flying when we aren’t able to get up in the air.

Use bad weather days effectively

Most of flying is about procedures so a bad weather day is an excellent day to review them. My instructor gave me this tip a long time ago, that when I get grounded on weather days, we can still go “chair flying!” Chair flying is an important technique that helps in mental and physical preparation for a flight.

This technique is effective because it allows the pilot to memorize procedures, techniques, checklists and so on without the need of an airplane – saving time and money. It makes procedures feel so natural and familiar that they will become second nature.  Practicing chair flying will make you better prepared for a flight and should be done regularly.

How to “chair fly”

To chair fly, pick a quiet spot where you can concentrate. Decide on what procedure or task you want to focus on, and make sure you have all the necessary materials you need – checklists, notes, maps, or procedures that will help you.

Create a goal for yourself that you want to achieve in the session. For example, I found this very useful for learning precautionary and forced landings.  My goal at the end of the practice session to be able to go through everything without having to  look at my notes.

Take the exercise seriously

Run through the procedure as if you were actually flying, so make the hand gestures to adjust mixture control and so on, make your necessary radio calls. Replicate the environment as much as possible.  I find talking out loud about each step I am doing is very effective.

Effective flight preparation requires practice of the procedures involved.

Chair flying will also help you dismiss anxiety of flying. When I was learning specialty takeoffs and landings, I would sit in a chair and run though everything that I needed to accomplish.

This imprinted the procedure in my mind and by the time I got out to do them I was relaxed and able to perform them without issue. When my instructor asked if I was ready, I could say yes and feel good about it. It saved me a lot of time, money and stress, and improved safety, too.

Good for learning airport procedures

When I was learning the taxi procedure at my new airport, I would sit in a chair and pretend I was taxiing running through the airport diagram and who I needed to call when.

Often, I will drive out to the airport in silence with the radio off, going through procedures while I drive.  I found this relaxes me and puts me in the mindset to fly.  When I get to the airport, I am centered, and ready.

Another good idea when we are weathered out and at the airport is to sit in the actual airplane and practice.  This is the most effective way to practice, it allows you to use the actual environment where you will be doing the procedures.  Once when I drove all the way out to the airport and couldn’t get off the ground, my instructor suggest that I sit in the plane anyway and practice my procedures.  I found it very helpful, and did not waste any time by driving out there and not being able to fly.

Practice frequently. Frequent, short sessions are more helpful than long, infrequent ones.