Posted on

Pilot Perception: Runway Illusions

On Final

The “softer” side of flying is the human factors side. As advanced as modern aircraft are, pilots are subject to various factors that can cause them to make excellent decisions and judgement calls but sometimes make decisions that can be potentially dangerous. Luckily, illusions pilots experience are well understood and documented.  We know when we may experience an illusion.  In instrument flying for example, we learn how to ignore what our body is telling us – for example, that we are in a steeply banked turn when we are in fact in level flight – we learn how to trust our instruments in IMC.   Sometimes the message our body is telling us can put us in danger if we subscribed to it.

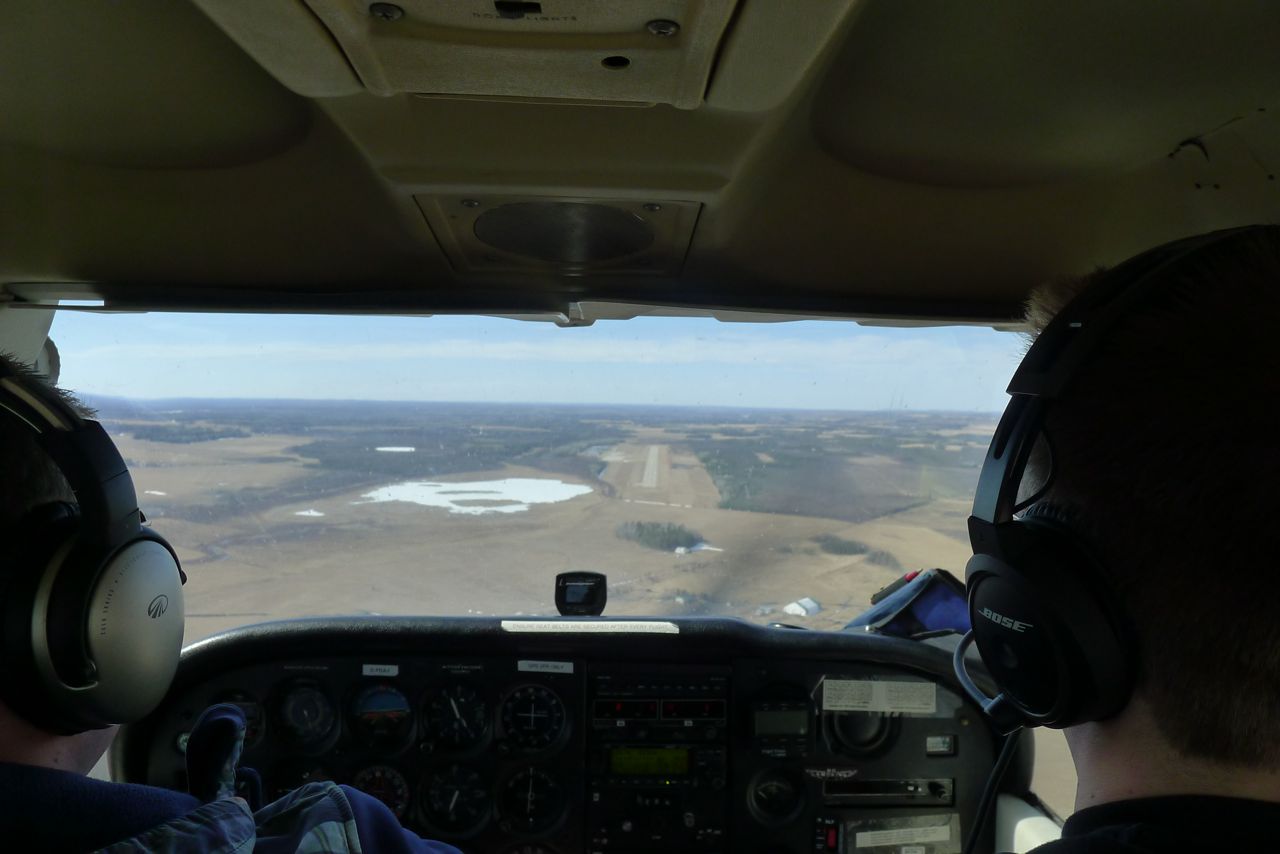
We are governed by the messages our body is sending to our brain.  This affects our flying and our perceptions of certain situations.  When we are approaching a runway with a up or down slope, or when we are approaching a runway that is level but the terrain before the runway is up or down sloping, it is possible and expected to incorrectly plan our approach.

Runway illusions are very common in flying, and are the result of our brain telling us something other than what is actually happening because it is extrapolating on what it sees.

Runway slope illusions. Image courtesy of americanflyers.net

When a runway is upsloping, the pilot thinks that the runway continues on an upslope from the terrain before it, hence thinking the terrain in front of the runway is upsloping as well.   The pilot will judge their altitude as too high, because they perceive the terrain continues on an upsloping, positive angle towards the runway  and will consequently plan a low approach that can cause landing short of the runway.

The solution? When flying toward a known upslope runway, expect that you will perceive being higher than you actually are and plan to land long on the runway.

When a runway is downsloping, the pilot thinks that they are too low and will consequently plan a higher approach and land long on the runway, or may even have to overshoot.   This is again, because of extrapolating on the slope of terrain before the runway.  Thinking that the terrain continues on a downslope towards the runway, means that the terrain is actually higher away from the runway than on the approach path; so that the entirety of the approach path follows downsloping terrain.  The pilot will incorrectly judge altitude as being too low when in fact he is too high.

The solution to planning an approach on a downsloping runway is to anticipate feeling like you are too low and plan to land short of the runway.

Also, when the runway is level but the terrain before the runway is upsloping: the pilot will extrapolate the same way.  They will think the runway is upsloping as well, and be subject to the same upslope illusion, and should plan to land long.  Alternatively, when the runway is level but the terrain before the runway is downsloping, the runway will also be judged as downsloping, and the pilot should plan to land short to avoid an overshoot.

It is hard to memorize the concept but I found that a good way of learning and remembering the concept is to draw an upsloping or downsloping runway and flat terrain in front of it. Then draw a straight dashed line following the angle of the runway towards the approach path, and this will be the pilots perception of the approach terrain.   From there we can easily imagine whether the pilot will feel too high or too low in each situation.

Rain on the windshield can create the the feeling of greater height and haze can make distances appear greater than they are. This is a favorite Transport Canada exam question as well!
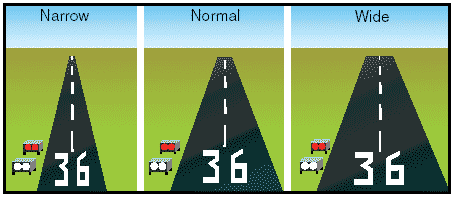
Wide and Narrow Runway IIlusion
Wide and Narrow Runway Illusion

There is also the classic, wide and narrow runway illusions.  When a runway is narrow, this creates the illusion that the plane is higher than it actually is, resulting in a low approach and possible land short of the runway. With a wider runway, the opposite occurs, we perceive the plane lower than actual, and can cause the pilot to flare too high or overshoot the runway.

Writing a lot of exams lately, I noticed that Transport Canada likes to test these topics!
Posted on 8 Comments

Learning to Land

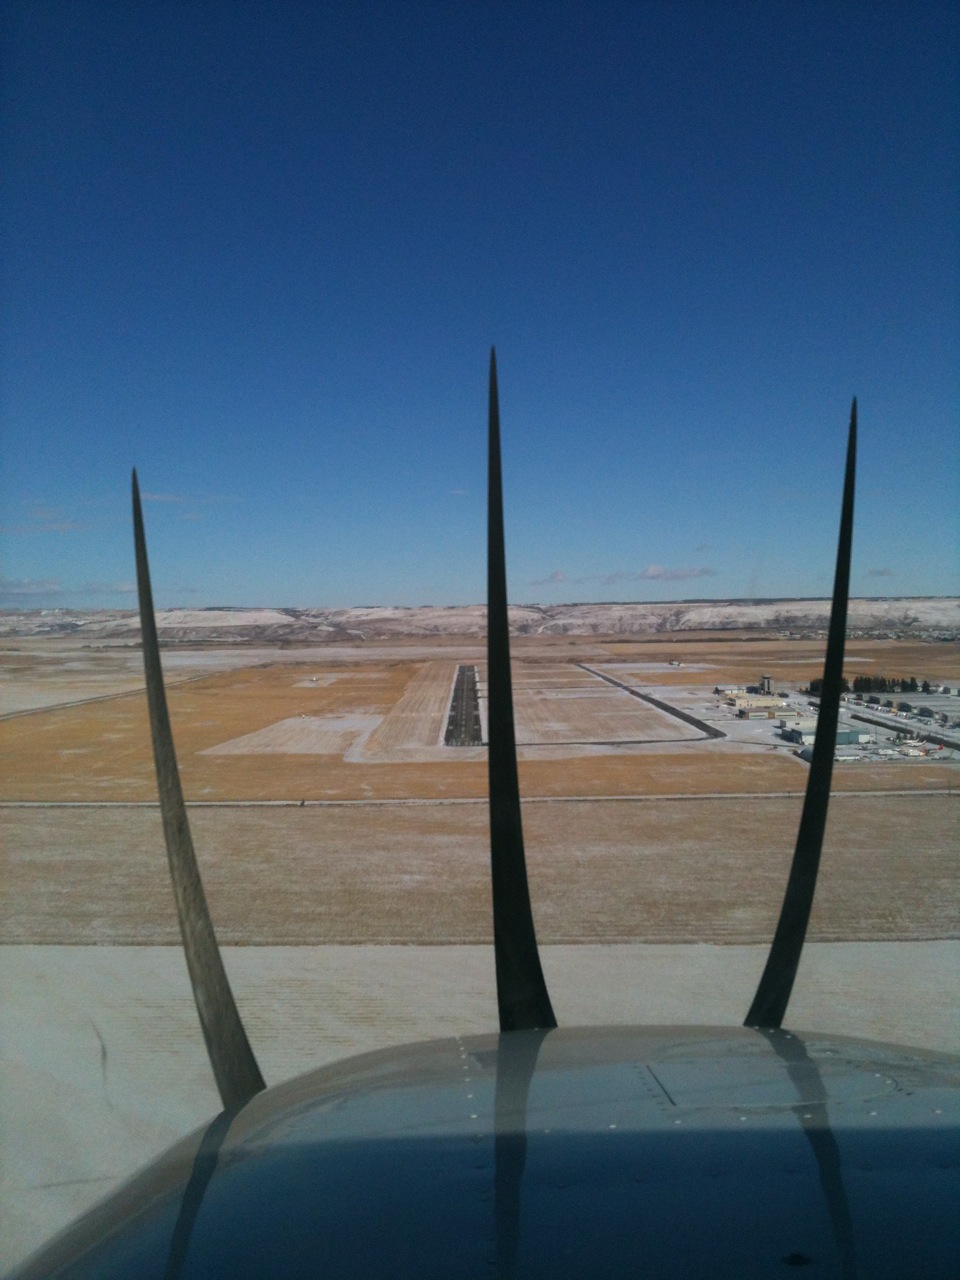
On approach for runway 34, CYBW

One of the hardest thing in flying is learning to land.  When I was struggling with the landing, my instructor made me feel better by letting me know this, and saying that she didn’t really “learn” how to land until she was doing her commercial license.  Of course she knew how to to it, but by that she meant that she didn’t really feel fully comfortable until then.

This put a few things into perspective, how long it will take until not only will it feel natural but you will not be so terrified and dry-mouthed every time you do it.  Since my first solo flight, I have really started paying attention how to possibly make the best landing happen consistently.  I haven’t been flying in the circuit much lately, so each flight I only get to do one of these landings so I try to make it as good as possible.

The landing sequence. This plane is about to flare.

One of the things that is very apparent is the amount of right rudder needed.  As you cut power to idle, and flare, you are operating the aircraft at very low power settings. Asymmetric thrust will cause the aircraft to want to yaw to the left: recall that the aircraft has left-turning tendencies which cause left yaw. This is actually what I noticed very clearly on my first solo flight, thinking it was the wind that was causing my nose to yaw to the left on landing, my instructor quickly corrected me that it was not using enough right rudder.

Four things will cause left -turning tendency. These are:

1. Torque reaction from engine and propeller

2.  Slipstream causing a corkscrewing effect of air hitting the tail on the right, yawing the aircraft to the left.

3.  Gyroscopic action of the propeller, the propeller is a gyroscope and tries to “spin” the aircraft the opposite way.

4.  Asymmetrical loading of the propeller at high nose attitudes.

On landing, asymmetric thrust causes the left yaw.  When you touch the ground, be prepared to add even more right rudder. The engine torque will cause the left wheel to carry slightly more weight than the right, increasing it’s drag and causing even more yaw to the left.

So how can you strive to make each landing perfect? I’ve made a list of steps that I think are very important to note:

1.  Check winds. When flying in the downwind leg, when on final, or whenever you get a chance note the windsock so you know what winds you will be experiencing on the ground and on your final approach. Will you have a crosswind?

2.    Approach at a constant airspeed for your configuration (whether using flaps or not), do not “chase” the airspeed: that is, do not focus your attention on the airspeed indicator and try to correct deviations by switching attitudes.  Establish your airspeed well in advance on final, note how the horizon looks when you have reached the proper airspeed, and keep it there. Once you have your airplane in the right attitude, keep it there.

3.   Pick a spot on the runway. When you stare at this spot, this is where you will flare. It also allows you to break down your desired touchdown spot and keep you from focusing on the entire runway.

4.  Flare 5-9 meters (15 to 30 feet) from the ground.  Over time, you will “sense” where this point is. I learned that to recognize this point is to when the movement of the ground suddenly becomes very apparent, the whole landing area seems to expand, and the point where the ground seems to be coming up so rapidly that something must be done about it.

5.  Once you flare, wait for the sink.  You are trying to bleed off airspeed.  Once you feel the sink, pull back more, just don’t pull back more before you feel the sink. This will cause the aircraft to balloon – gain lift – and the high nose attitude can cause you to stall when still too high above the ground resulting in a hard landing.   You need to cover up the runway with the nose of the aircraft to get the proper high nose landing attitude.  It will feel uncomfortable at first – it did for me.  This will allow you to avoid touching down with your nose gear, or having a ‘flat’ (three wheel) landing, which increases the risk of wheelbarrow. Pull back slightly each time you feel a sink, this will allow you to check your rate of descent until all flying speed is lost and you can touch the runway as lightly as possible.

6. Get in the habit of keeping your hand on the throttle throughout the landing. If something happens, for example if the landing is not going well and you need to overshoot or if there is something else wrong and you require application of power, the time to get this power if your hand was not on the throttle is too long.

There are four different kinds of landings:

  1. Normal landing
  2. Cross-wind landing; where wind inputs will be needed
  3. Short field landing, and
  4. Soft field landing.

We learn each landing and we practice all of them until they present no difficulty.

Posted on 4 Comments

The Forced Approach and Landing

Forced Landing of TACA Airlines Flight 110. Image Courtesy of airliners.net

So now that we know about the precautionary procedure, what happens if we have NO engine power?

We plan a forced landing! The image above shows an actual forced landing of a Boeing 737 jet. TACA Airlines Flight 110 lost power in both engines and successfully glided and landed on an unprepared, makeshift field (image courtesy of airliners.net).

Is planning a forced landing possible?

For those who believe that a successful forced landing is difficult or impossible to achieve, Transport Canada’s “Flight Training Manual” (FTM) reminds us that for glider pilots every landing must be a successful forced landing. Hence, it is not only possible that it can be done, it can be done well.

Yesterday I went through the basics again with my instructor.  Each instructor has a different way of teaching, so the method will vary slightly for everyone.  The basics are more or less the same.

Famous Forced Landing: The ditching of US Airways Flight 1549 into the Hudson River. Image Source: wikipedia.org
Famous Forced Landing: The ditching of US Airways Flight 1549 into the Hudson River. Image Courtesy of wikipedia.org.

The most successful recent emergency forced landing was US Airways flight 1549: a ditching in the Hudson River. After multiple bird strikes into the engines caused dual engine flameout,  the gliding Airbus A320, which didn’t have enough altitude to return to the airport, was successfully ditched in the Hudson River. Like all pilots, trained in forced approaches, he captain used the same line of thinking that we are taught when learning how to execute a forced approach and landing.

We are flying along – and – we’ve lost engine power! What is the first thing we do? We fly the plane.

(1) Best Glide Speed

We have to establish our aircraft in “best glide speed.”  For the Cessna 172, this is 65 knots. The best glide speed provides the maximum “lift to drag” ratio and allows the airplane to glide as as long as possible.

(2) Best Field

Now we have to look outside and quickly locate the best field where we will put our aircraft.  We locate this field, and turn towards it.  Look for indicators of wind direction on the ground, and make your best efforts to land into the wind. If in doubt of wind direction, simply plan to land in the same direction that you took off from the airport.

Make sure to do a good check of the suitability of the area for landing. This means: check for civilization, obstacles, wind, field length, and landing surface – abbreviated the COWLS check.

(3) Fault

Now that we have our field chosen and have established our glide, we have some time to do some quick engine checks to try to determine the cause of engine failure. Often, with carburetor equipped aircraft such as the Cessna 172 the engine can die due to carb icing.  Or if we descend from a higher altitude and we fail to richen the mixture. These quit simple steps will attempt to reestablish engine power and will not cause us to loose too much time and altitude.

Fuel Selector Valve: Both

Mixture: Full Rich

Carb Heat: On

Ignition: Both

If it doesn’t start, we simply shutdown the engine using the same steps as above:

Fuel Selector Valve: Off

Mixture: Idle cut off

Carb Heat: Off

Ignition: Off.

The above three steps should take us about 500′ of elevation loss to do. Since this is a simulation … we do an engine warm up by adding 200 or so RPM.

(4) Mayday Call

Before we get too low we make the Mayday call. We say “Mayday” three times and our aircraft identifier three times (just like in the case of a precautionary landing).  Broadcast your location, your intentions of where you plan to put the aircraft, the nature of your emergency, and the number of people aboard.

(5) Passenger Brief

Let your passengers know: to put their seat back, stay clear of flight controls, put away all sharp objects, and so on.  You can let them know where the ELT and fire extinguisher are.  Also, it is important to ask them to unlatch the door prior to touchdown.

If this landing is on an unprepared surface, your landing will be a soft field landing.

Make sure to assess how the prevailing winds will affect your approach and landing. What are the upper winds doing?  Also state that you intend to touch down on the first third of the field.  For the Cessna 172, we touch down slightly tail low and turn off the electrical as instructed in the POH.

Successful Forced landings

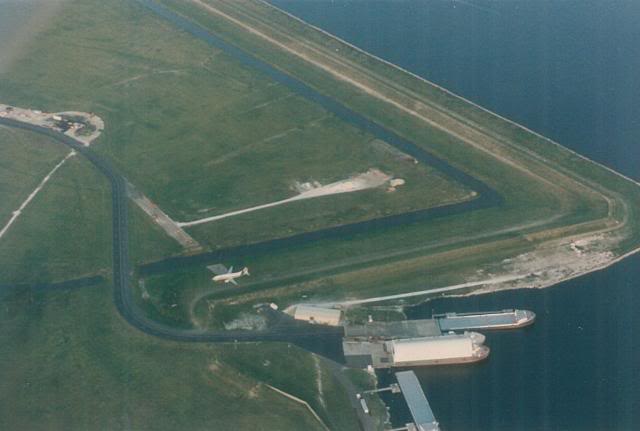
Another example of a very successful forced approach is in the case of Taca Airlines Flight 110 on May 24, 1988. After flying through severe thunderstorms, the jet lost both engines that the pilots were not able to restart.  In the perfect moment the captain found a grass field and pointed the giant gliding 737 towards it. He was able to land successfully with no loss of life and minimal aircraft damage. In fact, Boeing engineers were able to do the necessary repair work on the spot and the aircraft was flown from the very spot where it was landed! Watch the video of the incident below.

http://www.dailymotion.com/video/x18y15x_mayday-air-crash-investigation-s11e11-nowhere-to-land_shortfilms

Read details of how to plan your approach and land in your desired touchdown spot. This is the low key / high key planning procedure.

Posted on 3 Comments

The short field takeoff and landing with obstacle

Approach and landing over an obstacle

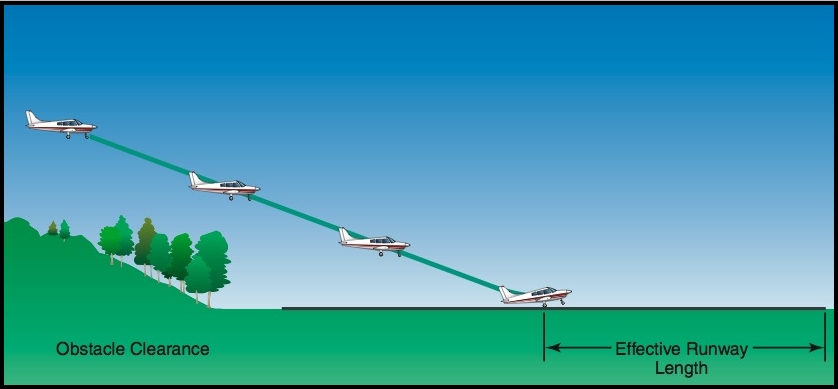
The next maneuver, after mastering the short field procedure, is doing so imagining  having to clear a 50 foot obstacle on both take off and landing. This is accomplished by imagining that there is a 50 foot obstacle at the end of our runway on the takeoff, and that there is a 50 foot obstacle on the start of our runway on the landing.

This short field takeoff and landing with obstacle procedure builds on the skills practiced in the short field takeoff and landing with no obstacle. The objective is to use as little  runway as possible to land and take off, but also to accurately plan our clearance point.  On the takeoff  we need to become airborne as soon as safely possible and climb as fast as possible so we clear our obstacle. This means we need to use Vx, our best angle of climb speed.

On the landing, we have to plan it so we approach so we clear the obstacle and at a proper speed so we still have enough runway to  stop.  The obstacle approach will have us touching down further down the runway then we would if we didn’t have an obstacle to clear, so we have less usable runway. We want to be at a slow enough speed commensurate with safety so we can stop with enough runway.

Ask for clearance

Since I fly out of Springbank airport, which is a controlled airport, I ask for a short delay on departure when I’m holding short of the runway.  In this procedure we line up at the very end of the runway – “on the button.”  Like the short field, we apply full brakes add full power, carb heat cold, check the engine and mixture (if required) and release the brakes.

The speed at which we rotate – or take off – will be given in the aircraft’s POH.  The POH will also give us the climb out speed. For the aircraft I learned on, GSKF, a Cessna 172 N, this is 46 knots. Note that the speed will change with respect to the aircraft’s weight – this is all given in the POH. The POH will also tell you if you need flaps or not for the procedure. For our aircraft I used 10 degrees of flaps.

Short field takeoff and climb with obstacle

Steeper climb-out angle

The main difference is we climb out at a much steeper angle than we did when we didn’t have an obstacle.  This causes the stall horn to sound – which I found disconcerting – but remember, the stall horn sounds 5-10 knots before the stall, so you will have time to ensure you control your speed, and on take-off, our speed is increasing, not decreasing.  Be aware, even though it takes a big longer to stall the aircraft at such high power settings, if you do, this is the dreaded departure stall.

Note clearing the obstacle

We need to mentally ‘note’ where the obstacle is, and to say “clear the obstacle’ once we have cleared it.  At Springbank, the altitude is 3940 feet, so once we are approximately at 4000 feet we announce we are clear the obstacle. The same follows, at 200 feet AGL we announce two positive rates and retract our flaps if we are using them.

More controlled, power-on approach required

The approach for landing is similar to the short field, with flaps – however the objective is to use a power on approach so once we reduce power to idle once we are are clear the obstacle.  We try not to approach too high initially so we decrease power to idle too soon – I made this mistake a few times while practicing, and on the flight test, the examiner wants to see that you know to decrease power once you are clear the obstacle, so they see you understand this is what you are trying to accomplish.

Once clear the obstacle which we imagine is at the start of the runway, we announce it, reduce power, and loose the last bit of altitude, flare and touch down. When we touch down, we push the nose down, retract the flaps, and add heavy brake while applying full back pressure with the control column.

Learning this procedure is challenging, but it is A LOT of fun!

Posted on 1 Comment

Short field landing

Short field landing and takeoff procedure explained

At a certain point, your lessons will be about precision flying after you know the basics.  Now my lessons are about more precise flying, not only just about making it down to the ground safely.  Recently I was practicing to aim to land at a particular spot on the runway, using different flap configurations and no flaps.  This was to get used to being precise and prepare for the short field landing technique.

The other day I learned the short field landing method. There are two kinds of short field procedures, with an obstacle (we usually use a 50 foot obstacle) and with no obstacle.  We did the landing without obstacle and next we will do with obstacle, as that is more advanced.   The non-obstacle technique assumes that the runway is clear of obstacles (such as trees or power lines) so we don’t have to worry about clearing anything on our approach or take off.

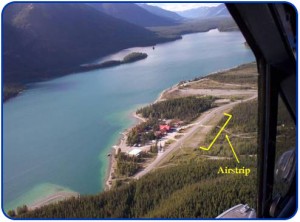
The short field landing technique is a lot of fun to learn and practice.  It is a specialty procedure that comes in handy when landing at an airport with an unknown runway length or when there are concerns about usable runway length.

We want to plan to use as little runway surface as possible to both take off and land. So on the take off, we line up “on the button” meaning as close to the runway edge as possible.

Short field takeoff

For the Cessna 172, and our particular model, and at Springbank airport, we then follow this takeoff procedure:

  1. Apply full brake
  2. Flaps 10 degrees
  3. Full power
  4. Lean the fuel mixture (check), then mixture full rich
  5. Confirm engine gauges in the green
  6. Release brakes

Once the aircraft starts to roll we steer with rudder to maintain runway centre line. Depending on the aircraft model, we lift off at the recommended speed to fly in ground effect. The particular aircraft we were in, FDAJ, this speed was 46 knots.  We pull up to fly in ground effect, and then push down on the control column to keep from climbing and keep the aircraft level. We fly in ground effect a few feet off the ground without climbing until the airspeed builds to 60 knots, at which point we pitch up and climb out at 65 knots.  We let the aircraft gain 200 feet of altitude AGL. At Springbank the above sea level altitude is 3940 ft, so we wait until our altimeter shows 4140 ft.  We then check for two positive rates on the instruments: one on the vertical speed indicator (VSI) and the altimeter – that is, the VSI is above zero which means the aircraft is in a climb, and that altimeter is increasing which also means the same. We take flaps to 0 degrees, that will establish our speed to 70 knots, and we climb out normally!

Short field Landing

Then there is the landing, which is followed by a full flap approach. In our aircraft we used 30 degrees of flaps and approached at 61 knots as recommended in the aircraft’s pilot operating handbook (POH). We wanted to plan to touch down 500-600 feet after we flared so we look for appropriate runway markers for us to judge this distance. At Springbank, runways 16 and 34 have 500 foot and 1000 foot markers, so it is easy to see our targets.

After we touch down, we apply the brakes – hard. We push the nose of the aircraft down for maximum brake effectiveness and retract the flaps to decrease the lift also to really make those brakes effective.  The first few times I landed I wasn’t aggressive enough on the brakes but eventually got to pushing down on them hard enough. The application of brakes should be so hard you actually are pushed forward and can feel your seat belt.  This is because we are trying to use the minimum runway length possible.

It was really a lot of fun to learn this procedure and I’m excited to try this next time, this time I will be on my own.

Posted on

The perfect landing

Normal landing touchdown attitude

The perfect landing technique explained

The most difficult part of learning to fly is, I think, the landing.  It is a precise series of steps that, when individually understood both aerodynamically and intellectually, result in a straight, soft landing no matter the wind conditions.  Since going solo for the first time I have been doing solo circuits, and have really been concentrating on my landing. Unbeknown to me, my landings, though soft are actually not that great.  Once I feel the aircraft sink I have a tendency to let go of the aircraft and let it sink, instead of holding off elevator pressure as long as I can.  This is one of the things that I have really noticed since I began flying solo.

Proper landing procedure

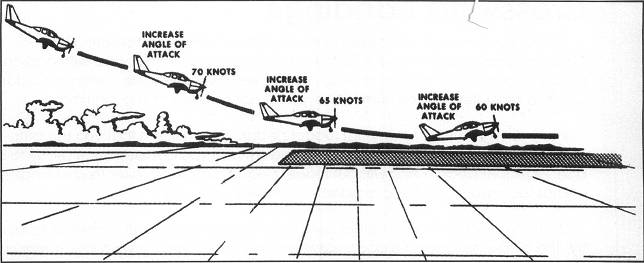
The proper landing procedure always follows a good approach. In the Cessna 172, this is approaching at 70 knots (with zero flaps) or 60 knots (with full flaps).  We can also use different degrees of flaps, such as 10, 20 or 30 depending on the 172 model.  Once we are over the runway threshold, and 2 -3 feet above the ground, we flare – using whatever works for you for knowing when to flare!  – I use the rule of when “the ground starts to come up so fast that something must be done about it.”

Once that is accomplished, you will feel the sink. My issue has been, that once I feel the sink I ‘give up’ and assume the aircraft is ready to land, and let it sink. This can result in a hard landing.  For me, I don’t get the hard landings but  tend to let my nose wheel touch down too soon. This can be dangerous as it can result in wheelbarrowing. The key is to hold the landing attitude as long as possible and bleed off your airspeed slowly.  So once you feel the sink, pull up until you have a very nose high attitude or high angle of attack.  This will cause the aircraft to sink slowly and incrementally. It will allow the main wheels to touch down first, and the landing will be soft.

What are your landings like? Comment below